
You can see here:
- This is a making of a new static, how I usually do it.
- How I do steam bendings
- Corrections with heat gun
- Handle glue on
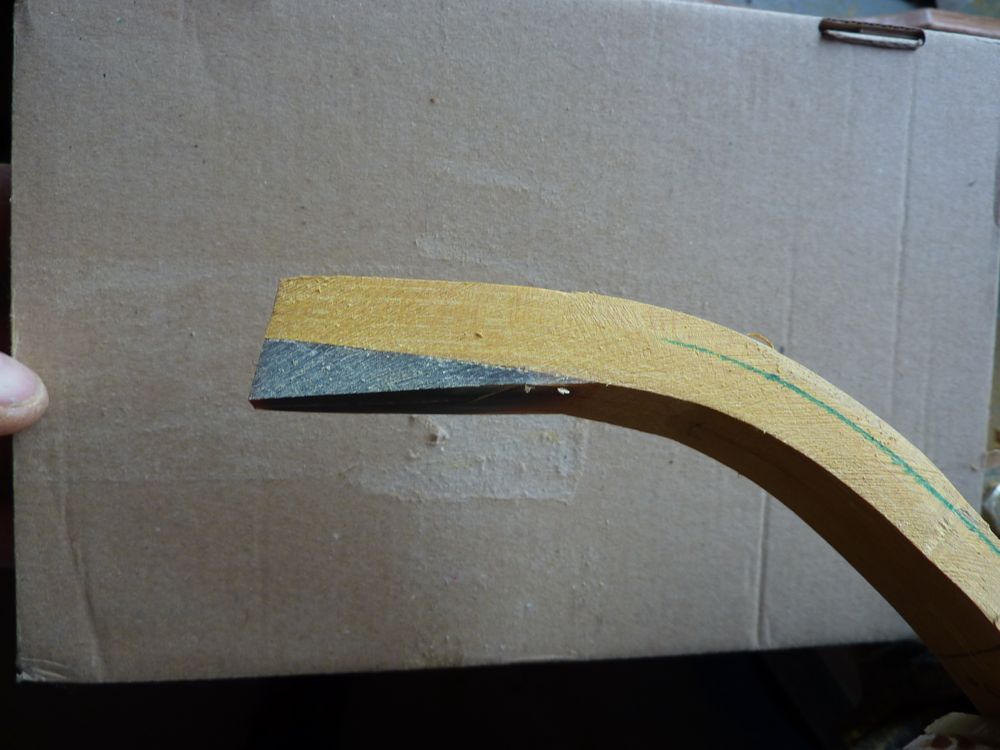
- Bone inlay as arrowpass
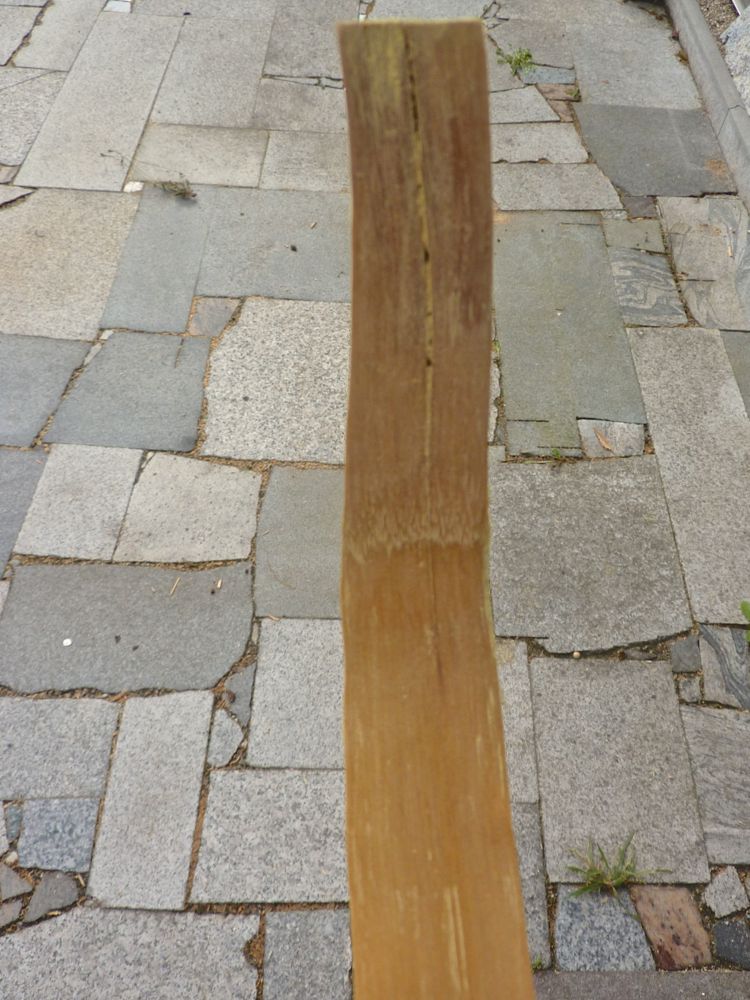
I’m aiming for about 60#. The stave is very nice, but a little twisted and a sabre
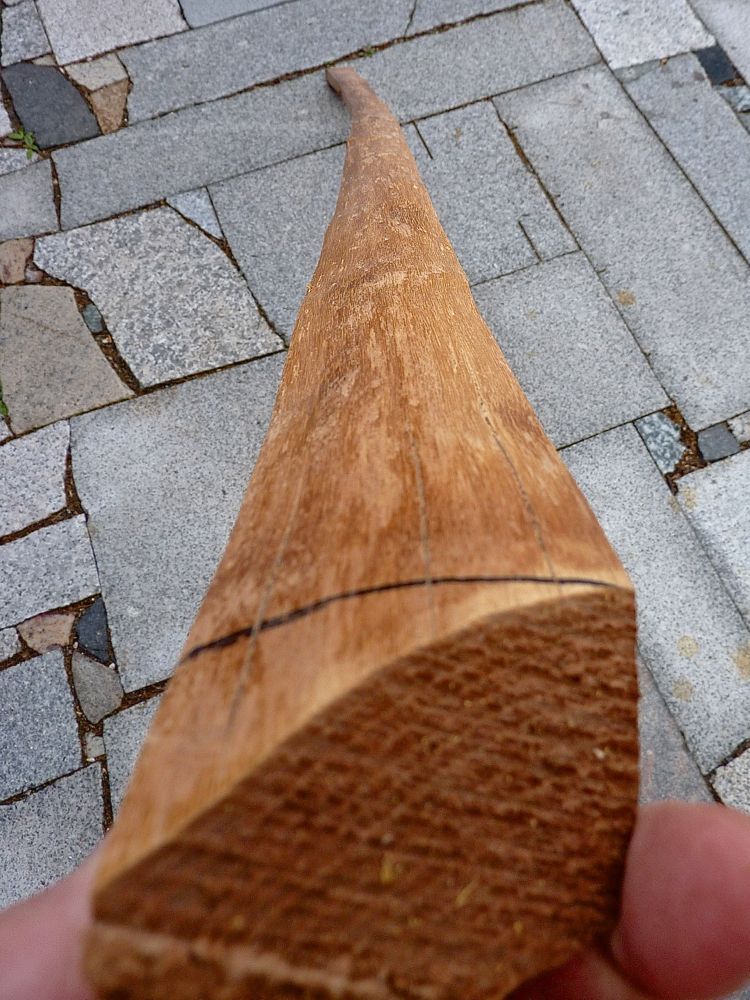
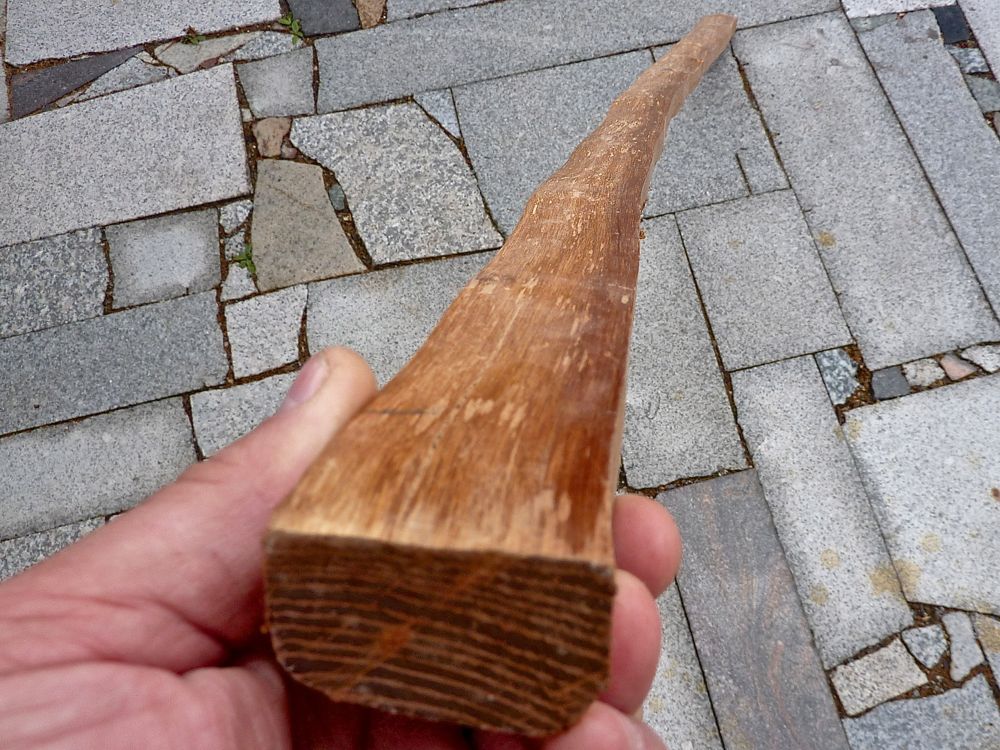
One side shows growth rings absolutely o.k., the other a bit thin – but I have to go with it. The stave was worked down to a growth ring several months ago, but there are some deep drying cracks on the outer limbs going through at least three rings. I hope, I could avoid them.
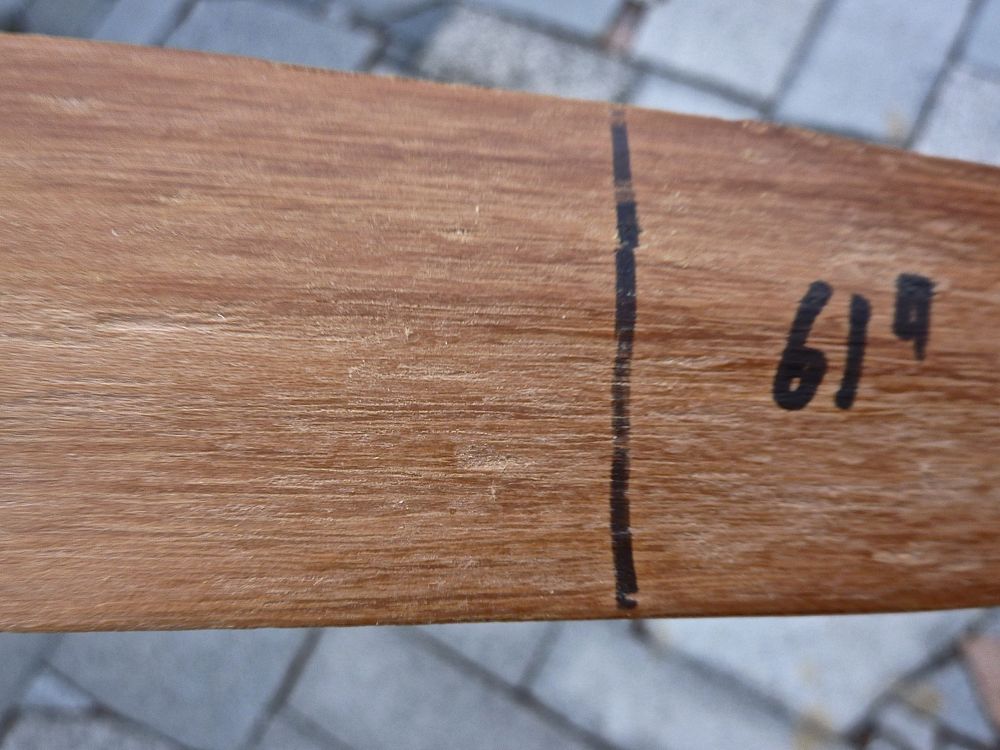
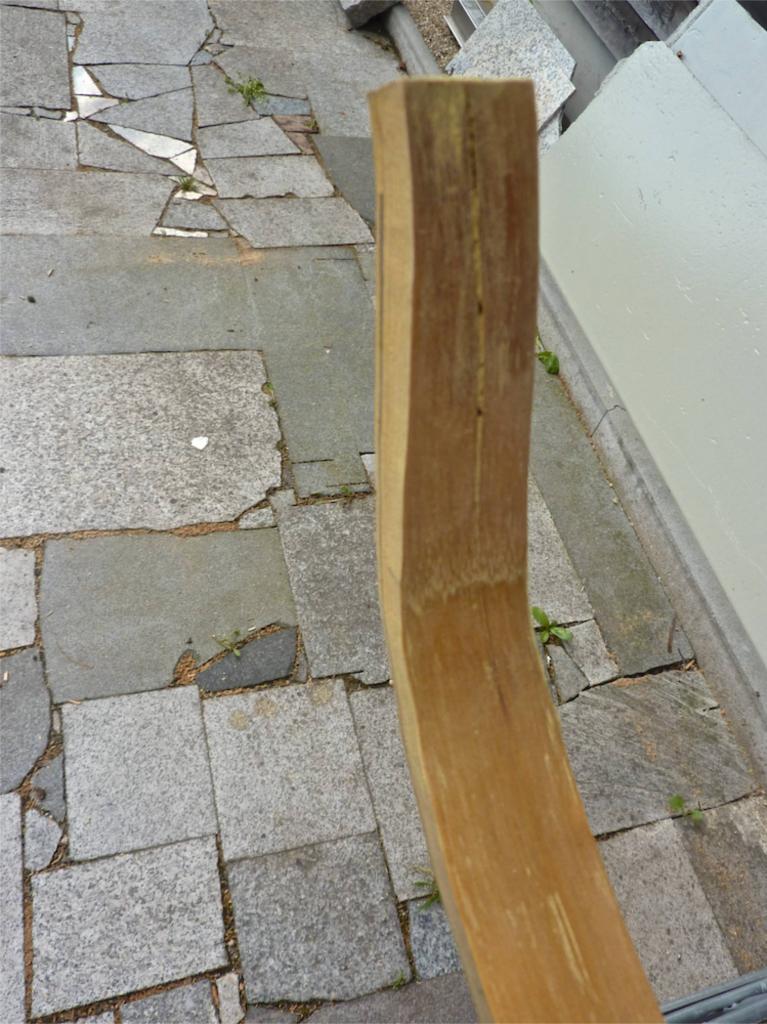
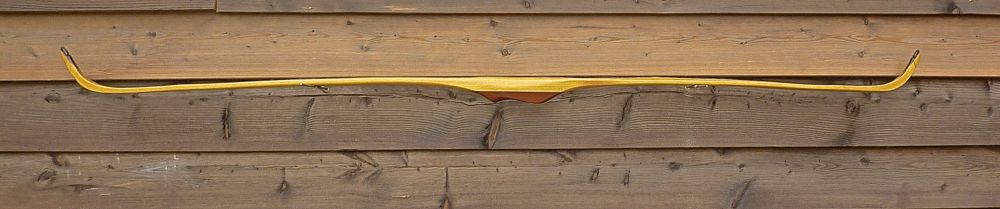
The stave is 61” long.
After the first clean up:

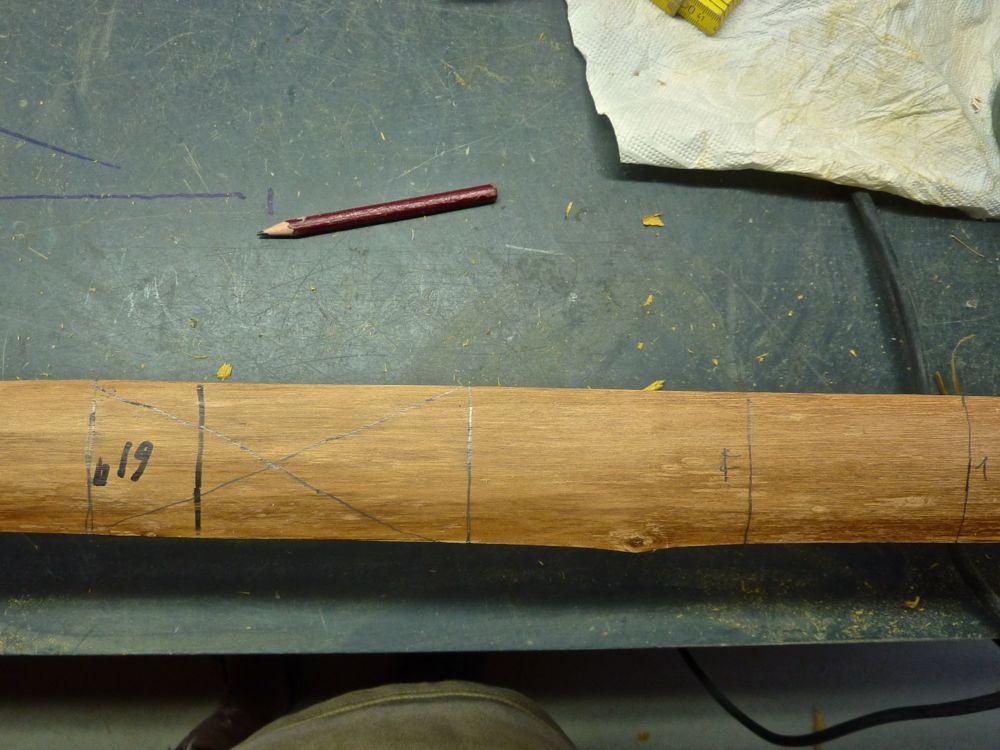
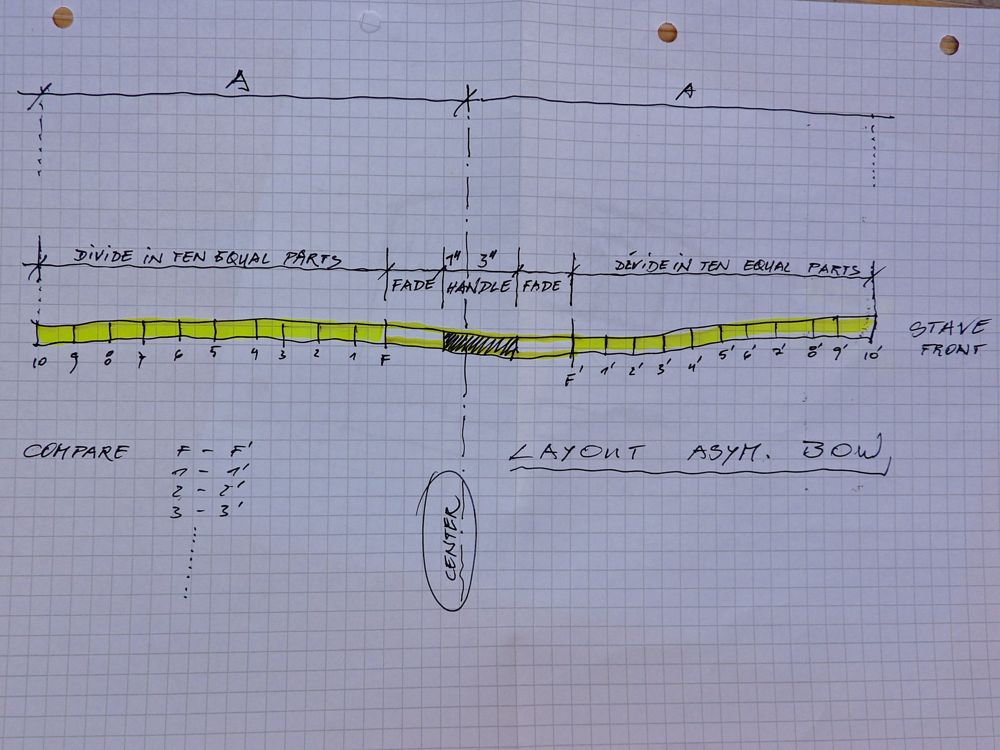
Lay out of handle, 1” above, 3” under center. Fades are marked 3” from handle. The limbs are divided in 10 parts and marked with a pencil. Of course the parts are different length in lower and upper limb.
I do not mark a center line lengthwise the stave. I let the draw knife search the line. Using extra sharp blade makes it easy finding the grain. The result is a parallel stave (front) from fade to tip. From there on I make the side taper by fading out with long draws with the knife.
First one limb is worked out, how I like the front profile, then the parts (pencil lines) were measured and the other limb is made the same. I work here very exactly. My measurements are made with a vernier caliper. The thickness is only rough worked down to a parallel thickness, for orientation a parallel line is drawn on both sides of the stave. The limbs were tapering out to the tips to a square of about 5/8”.

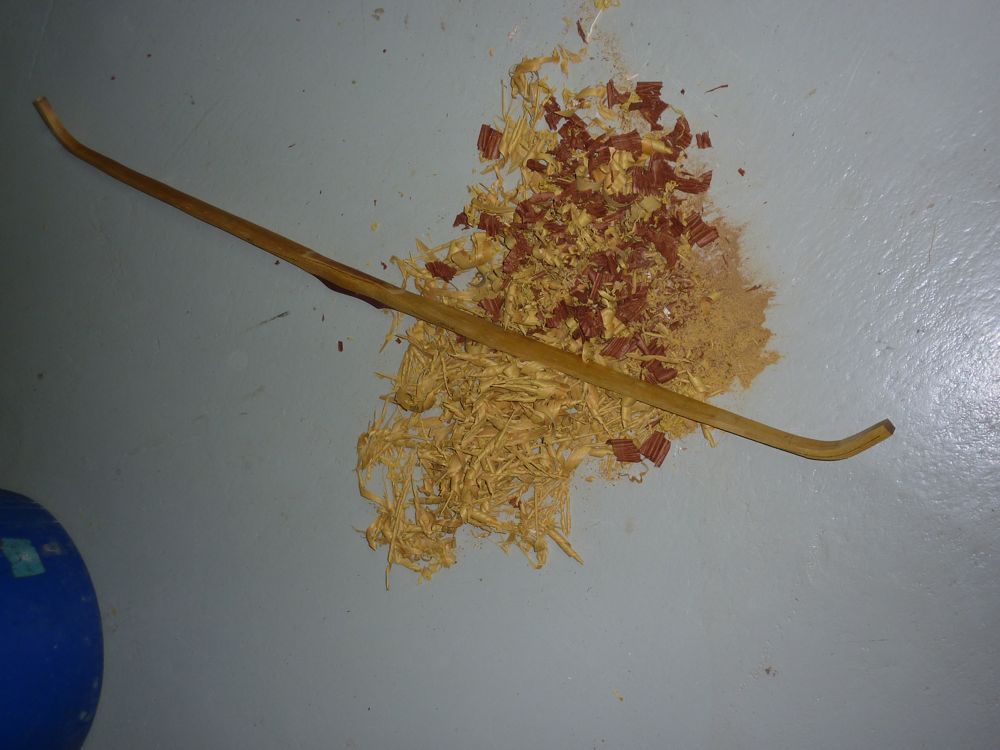
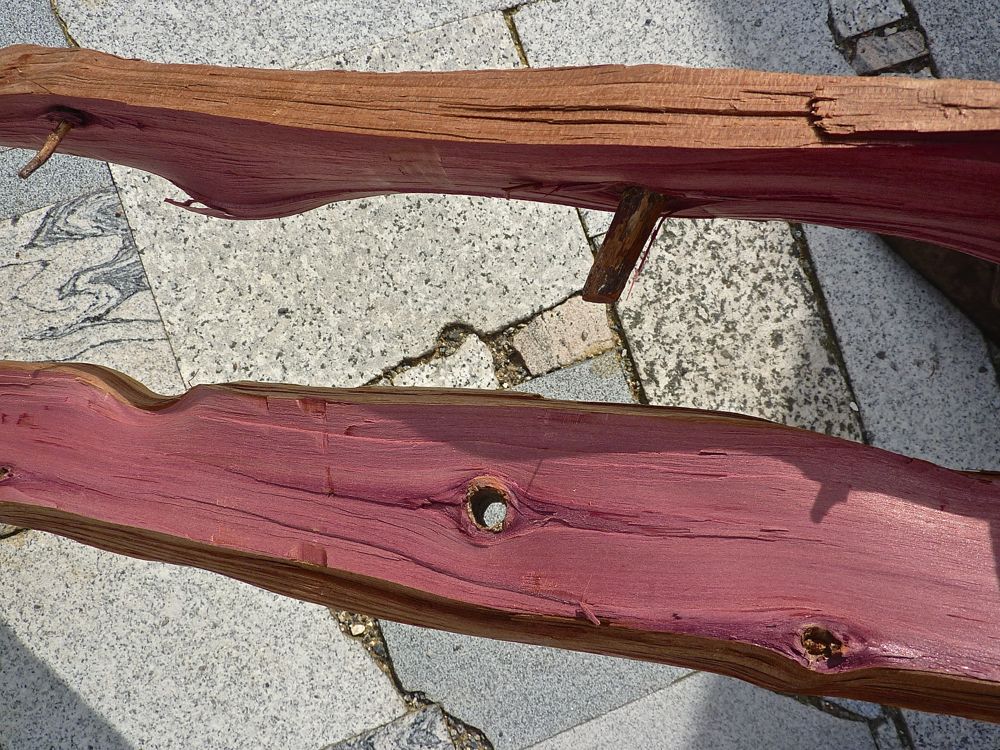
here is the left over from the first reduction

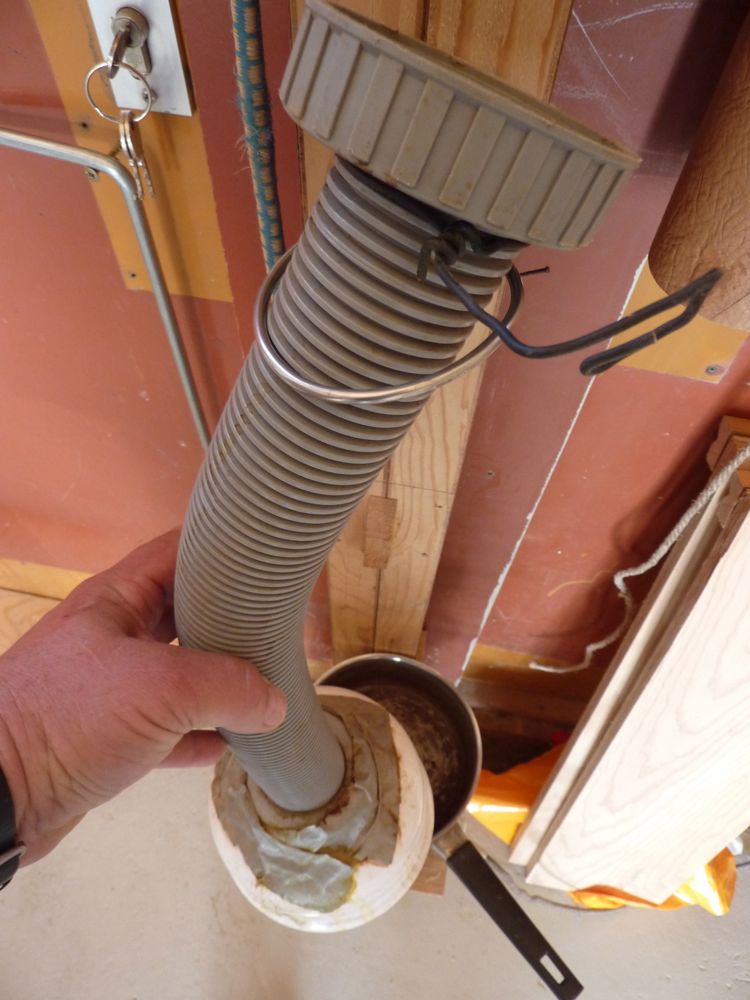
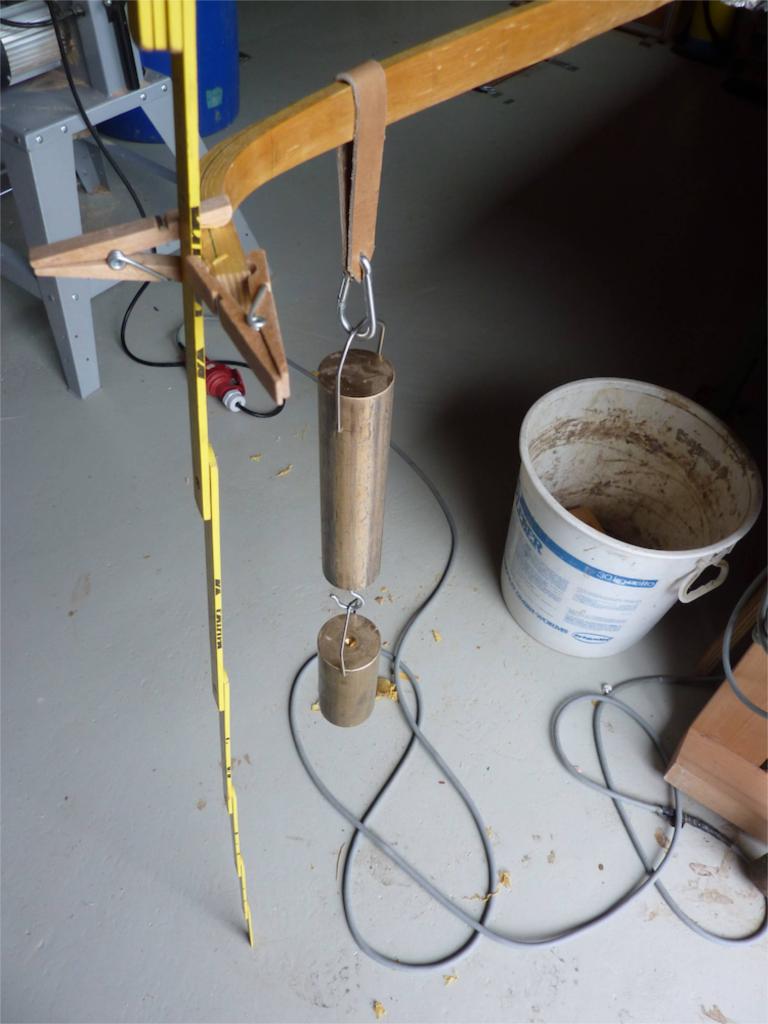
Now for the recurving. The next pic shows my boiling machine, made from an electric cooker (from grandma), a cooking pot, an old plastic salad pot and a flex plastic tube (allows even boiling character staves). The stave is fixed in the tube with some cloth, so the steam and the heat remains in the tube. I heat the thing for about 30 min.
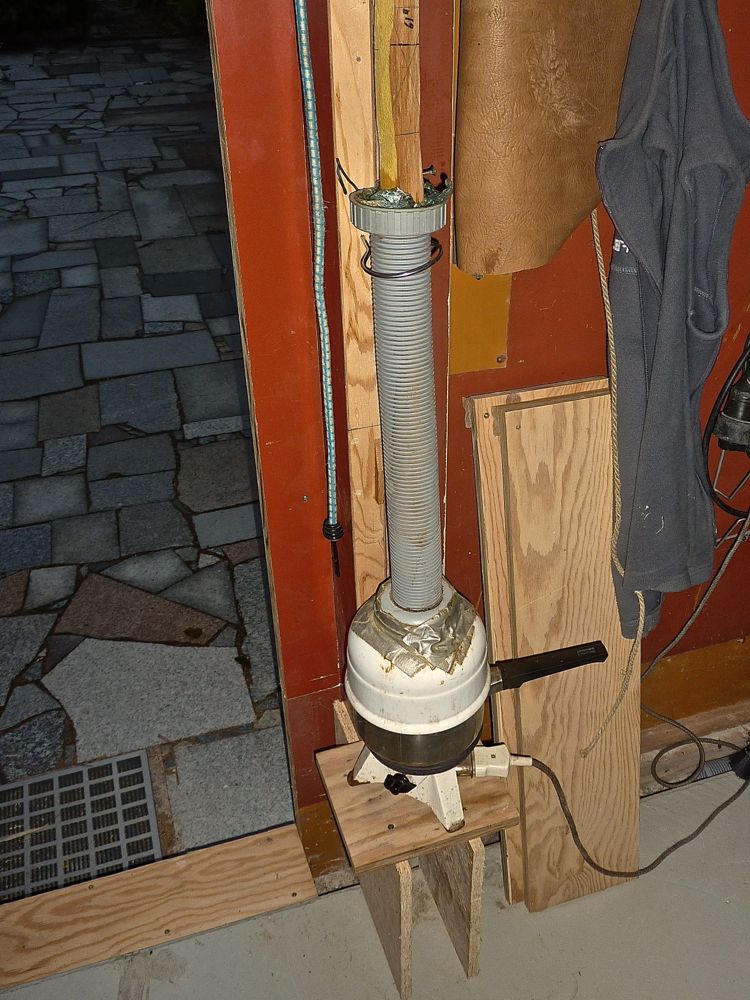
here is the simple caul (made in 2 min) from a plywood board. On the stave you can see the green line for rough thickness.
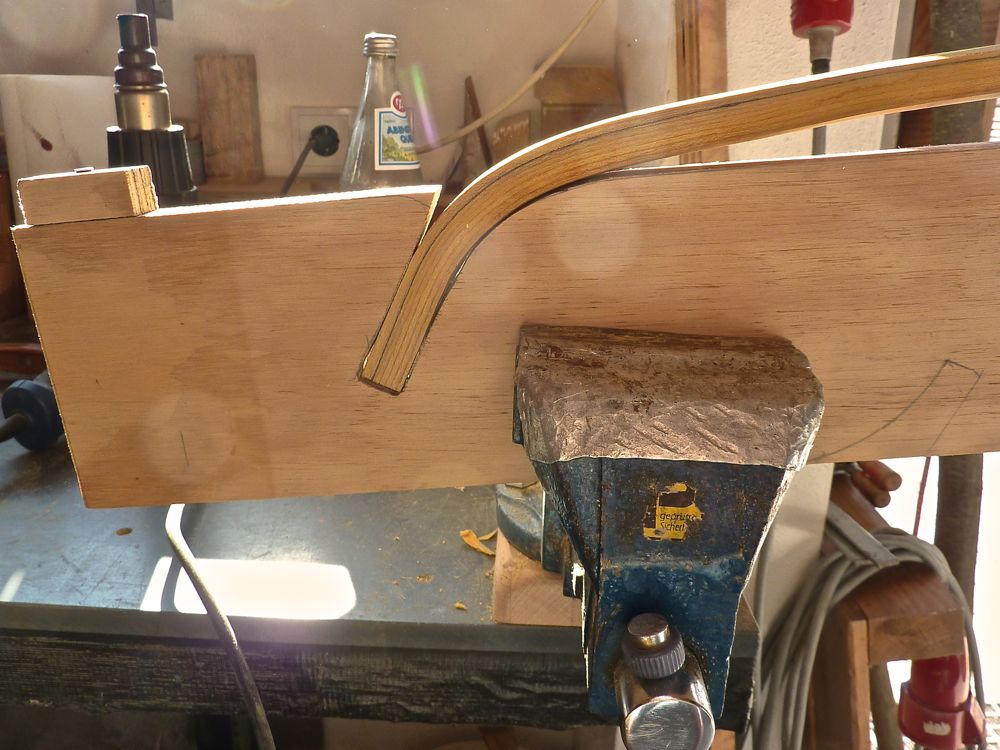
I use two short cauls for the recurves, this allows doing both recurves in one session. I let them cool down over night.
here it is with the mounted horizontal pipe used for boiling midlimb or at handle
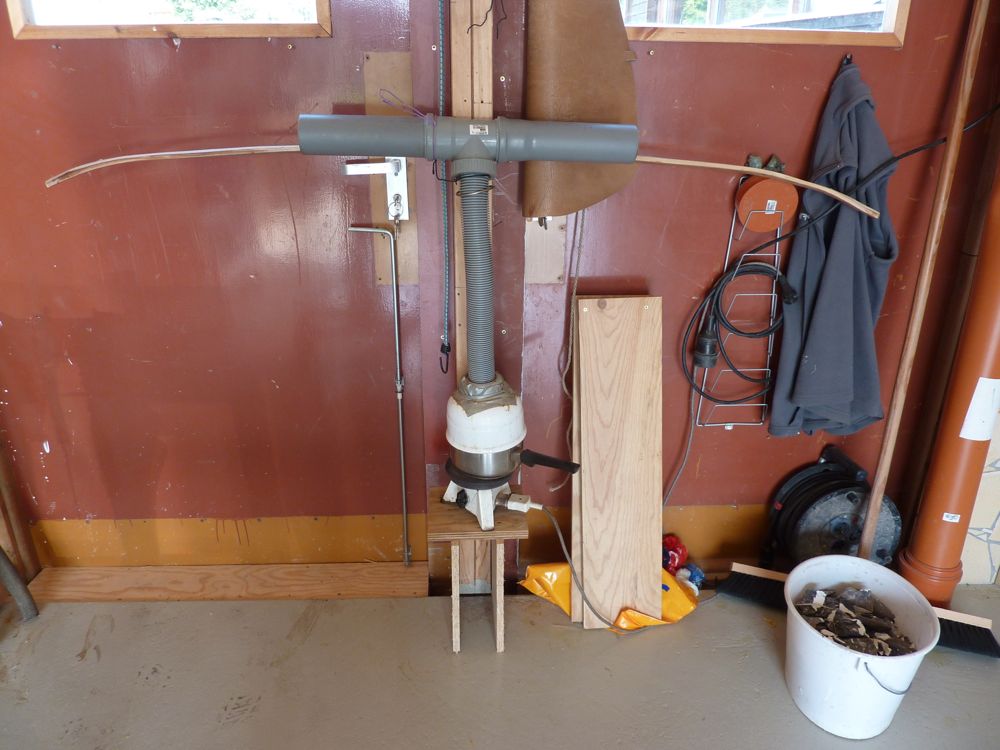
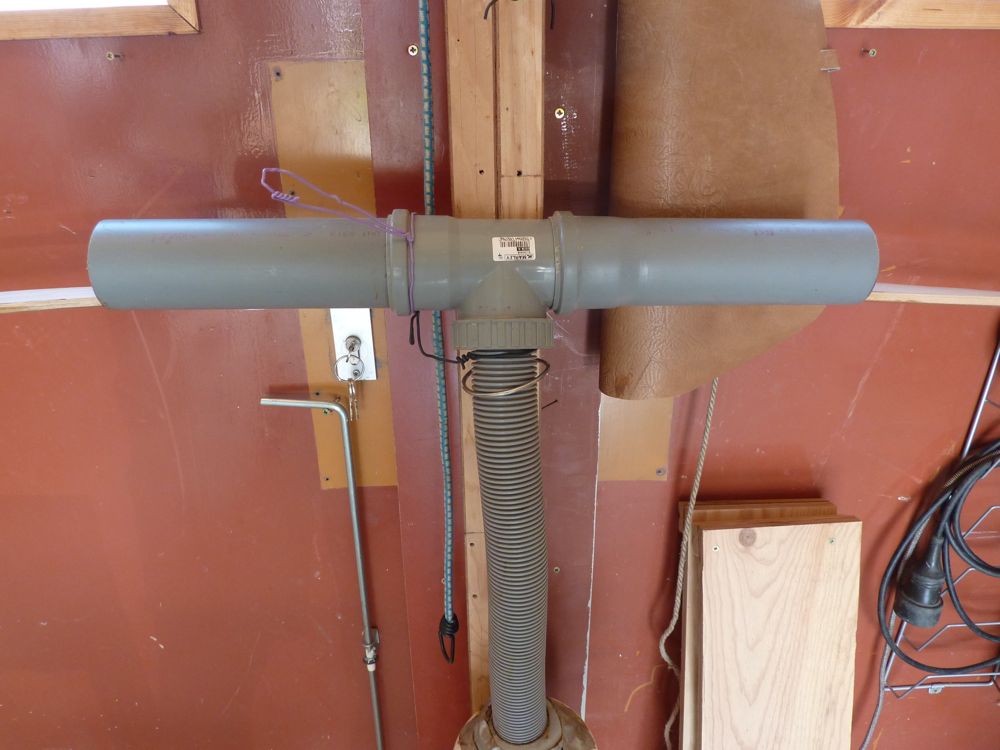
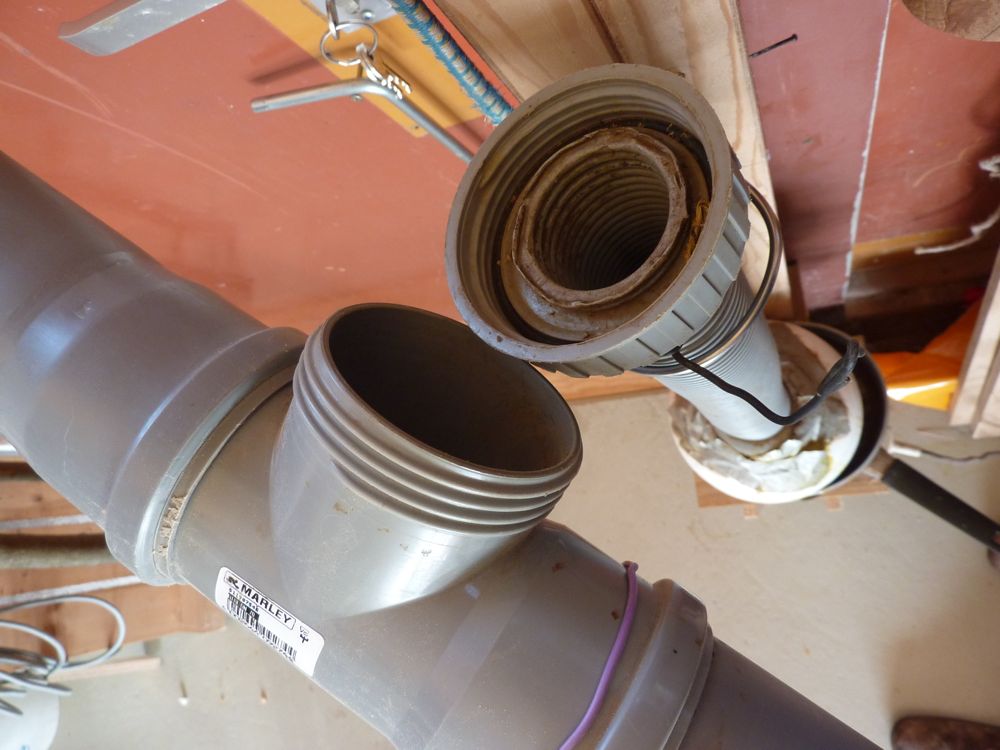
the flex pipe allows boiling snakeys or character staves
here is a quick sketch about the layout, should have made it in session one … just to clarify the system
Now let’s go on:
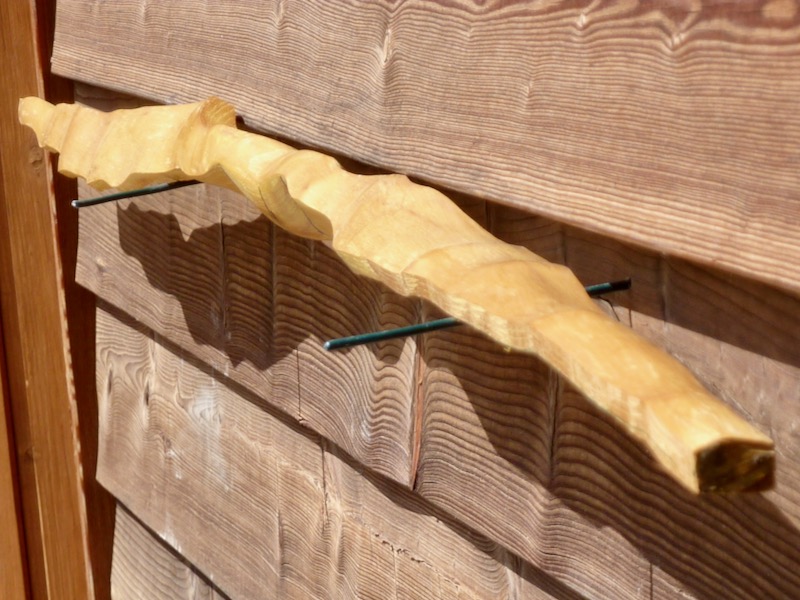
I don’t trust in the old chased ring, I go for the next and let portions from the old on handle (allows to round out on the back) and tips (perhaps I need them, we will see).
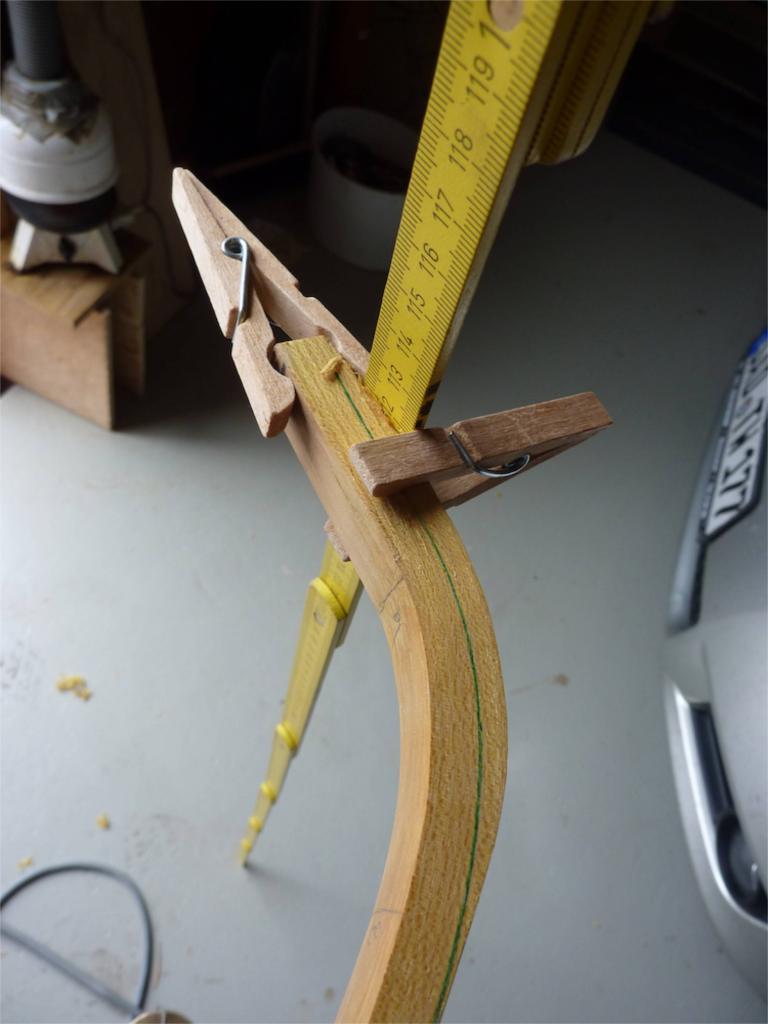
looking down the stave you see the limb is off about 2-3”. forgot to say: most of the twist was corrected with the recurving job.
The string alignment was corrected with boiling midlimb, did come along nicely, but still 1½” off. I will do the rest with dry heat .
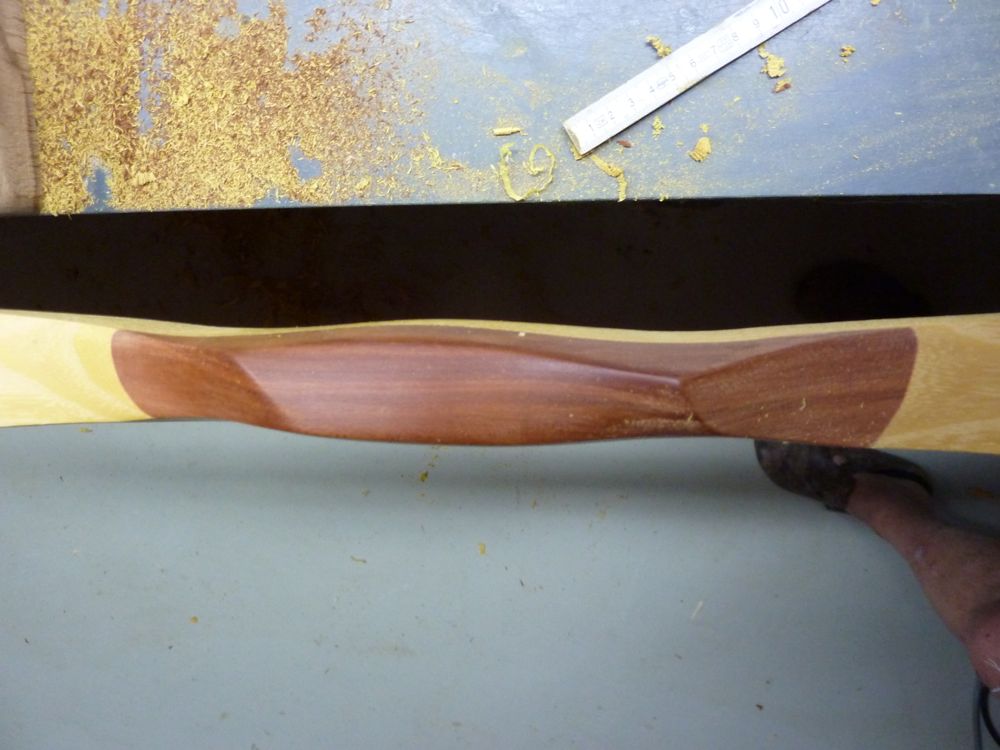
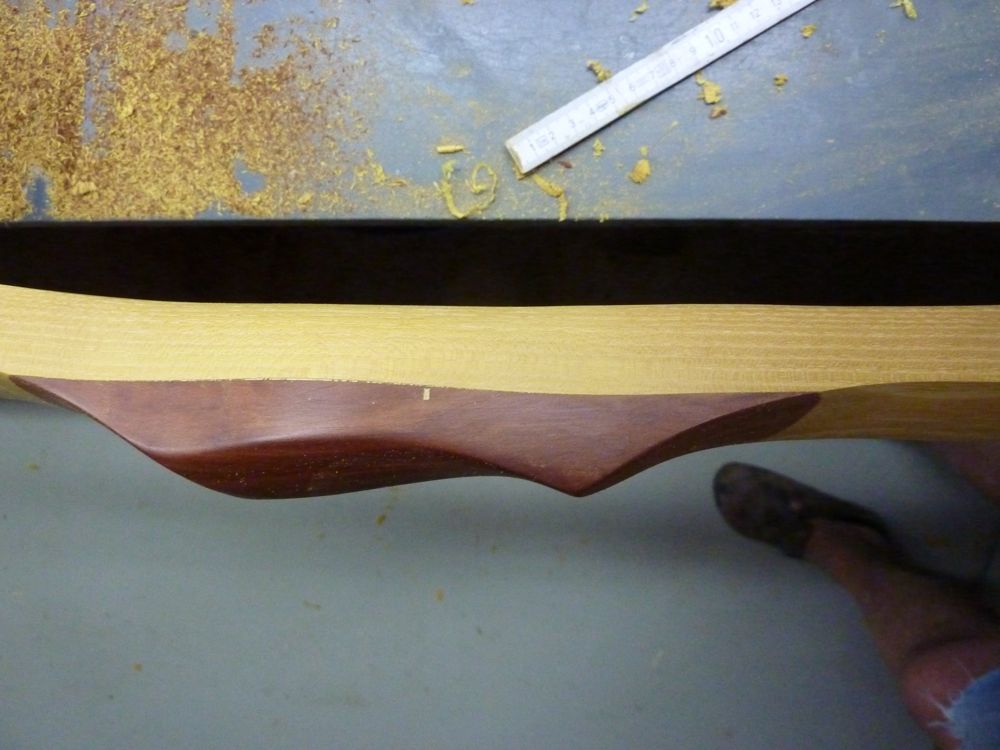
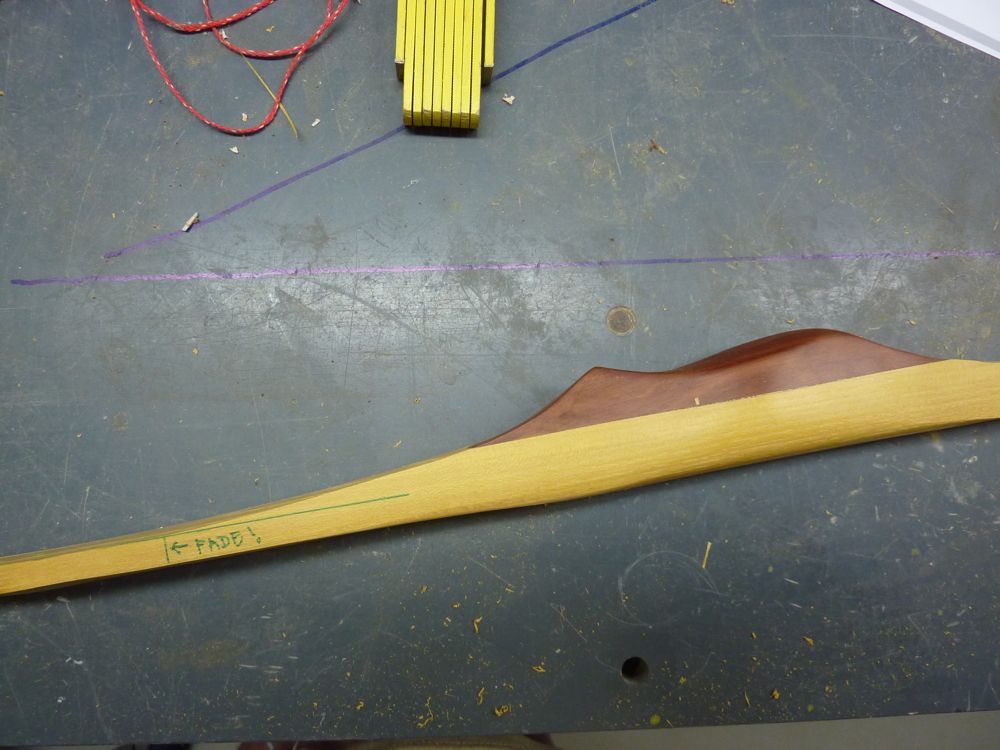
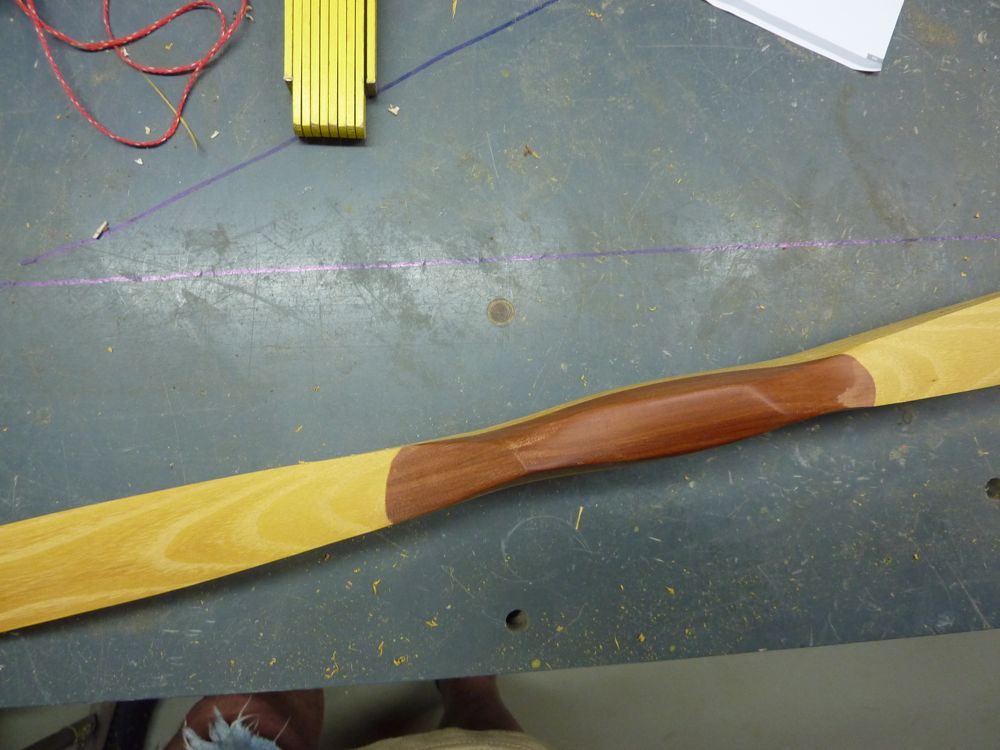
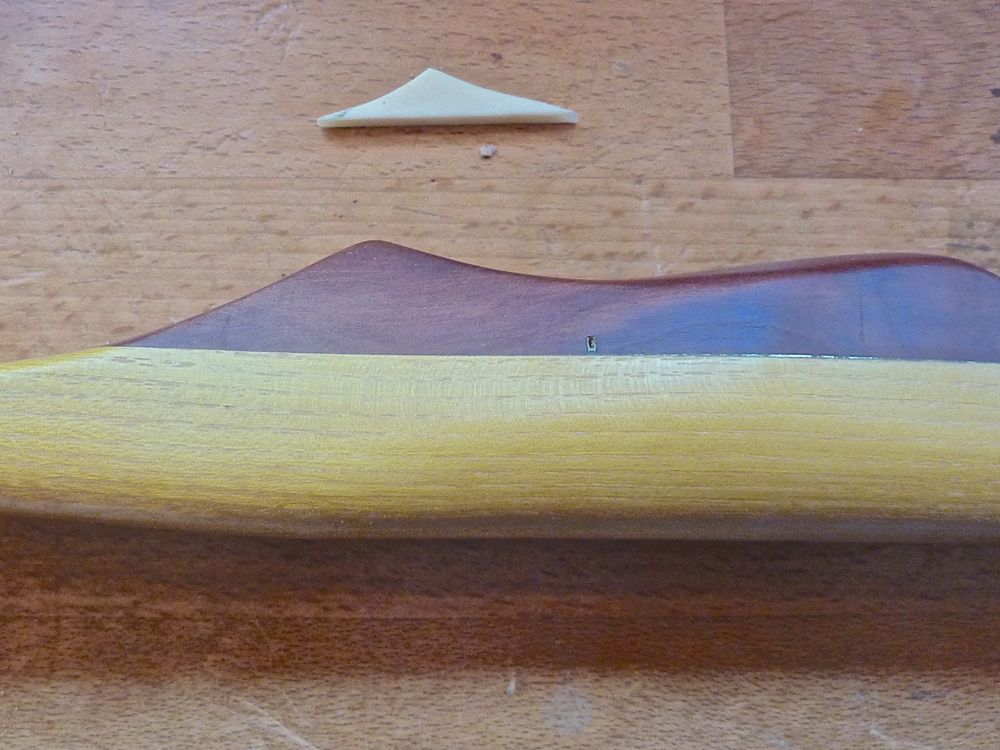
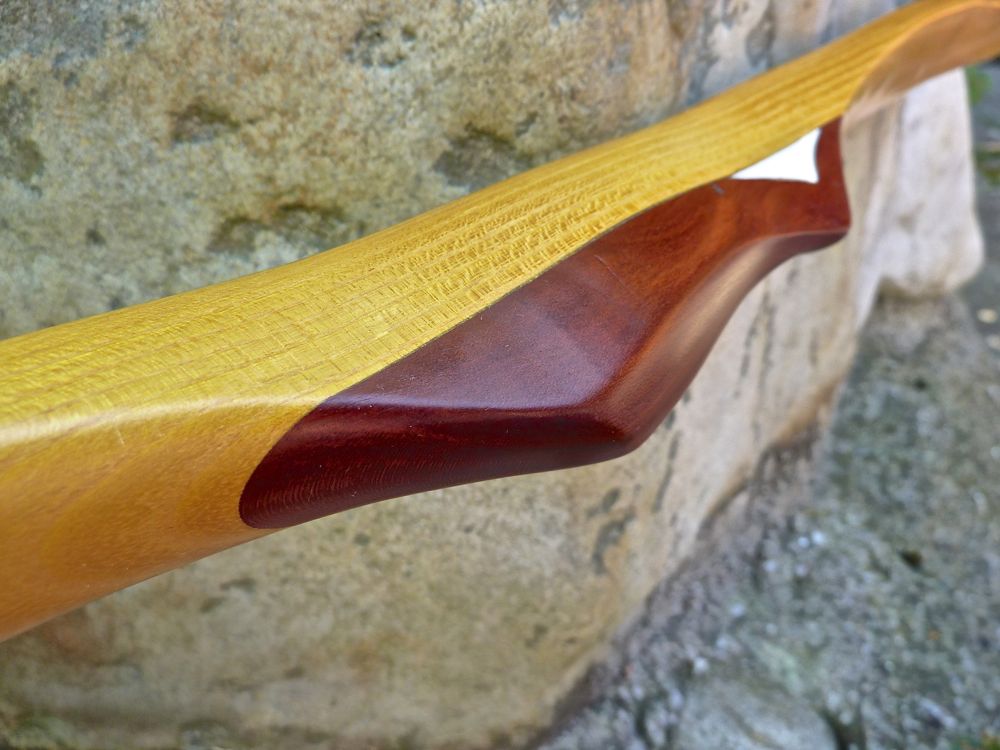
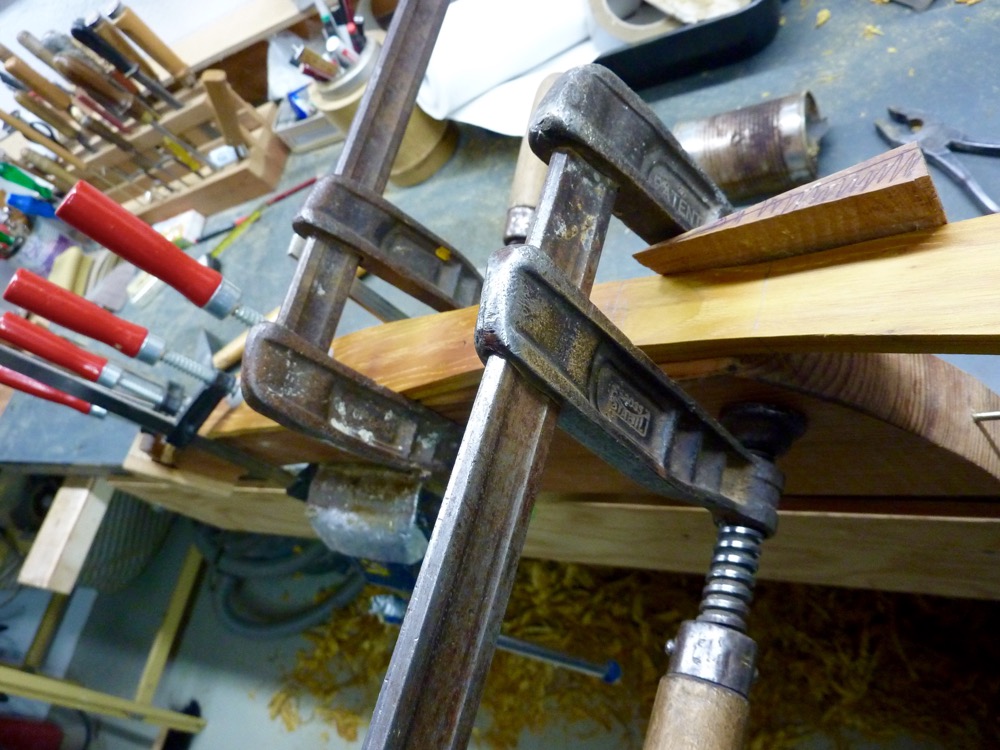
I will go for a deep handle on this bow, but the stave wasn’t thick enough. The handle is planed down for a glue up.
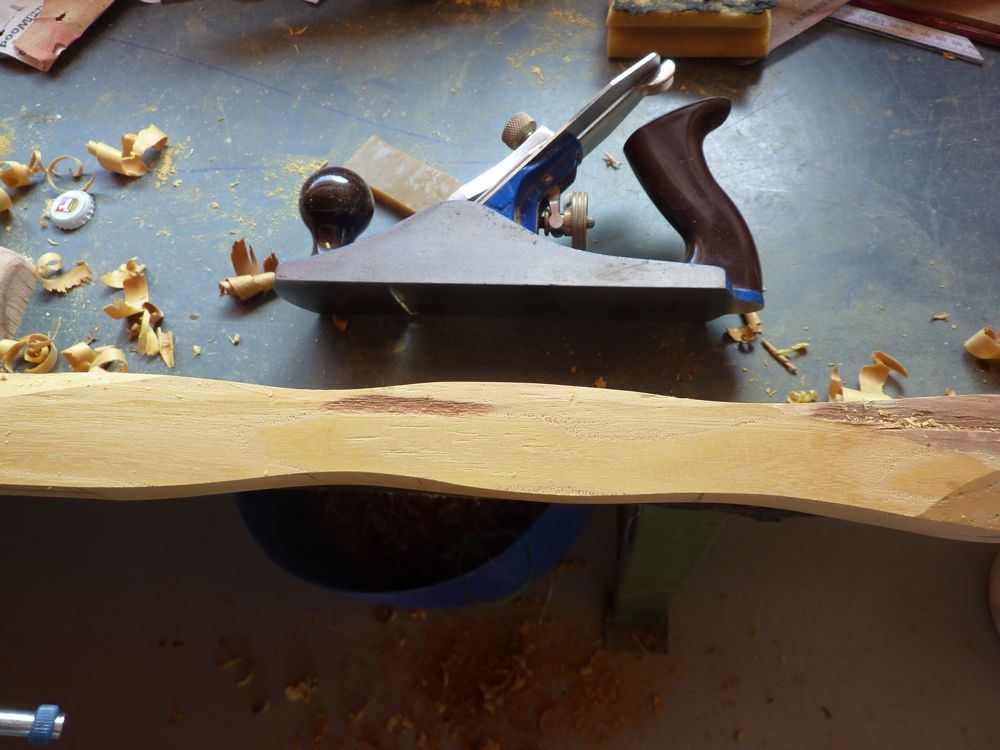
I found a nice piece of plum heartwood, which I also prepped for the glue line …
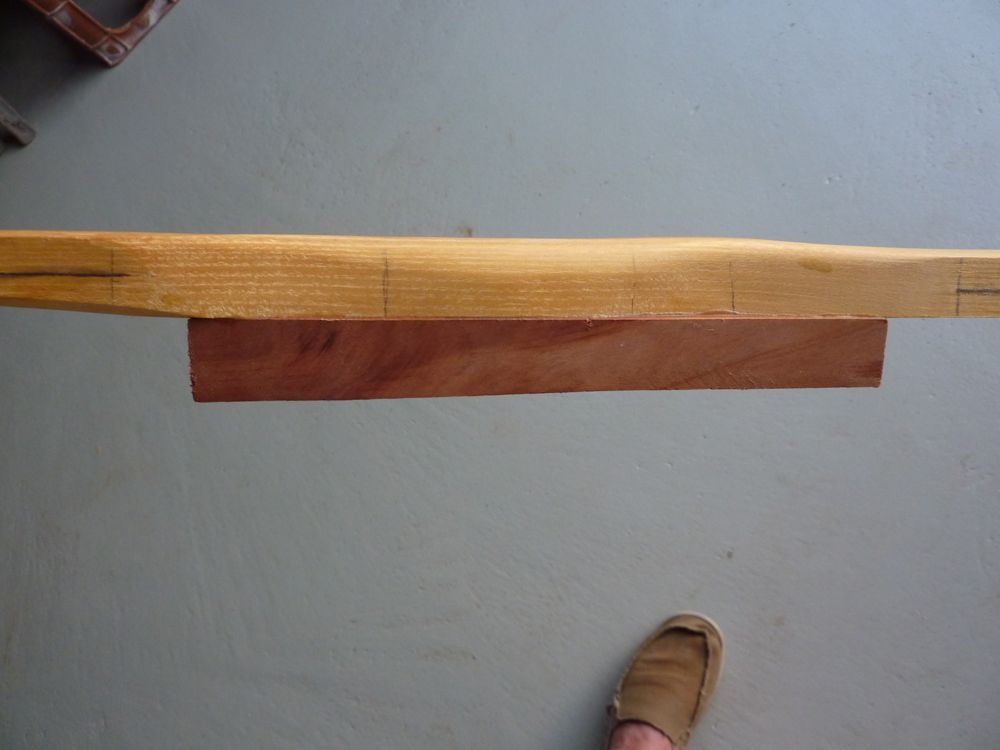

a few rough rasping …
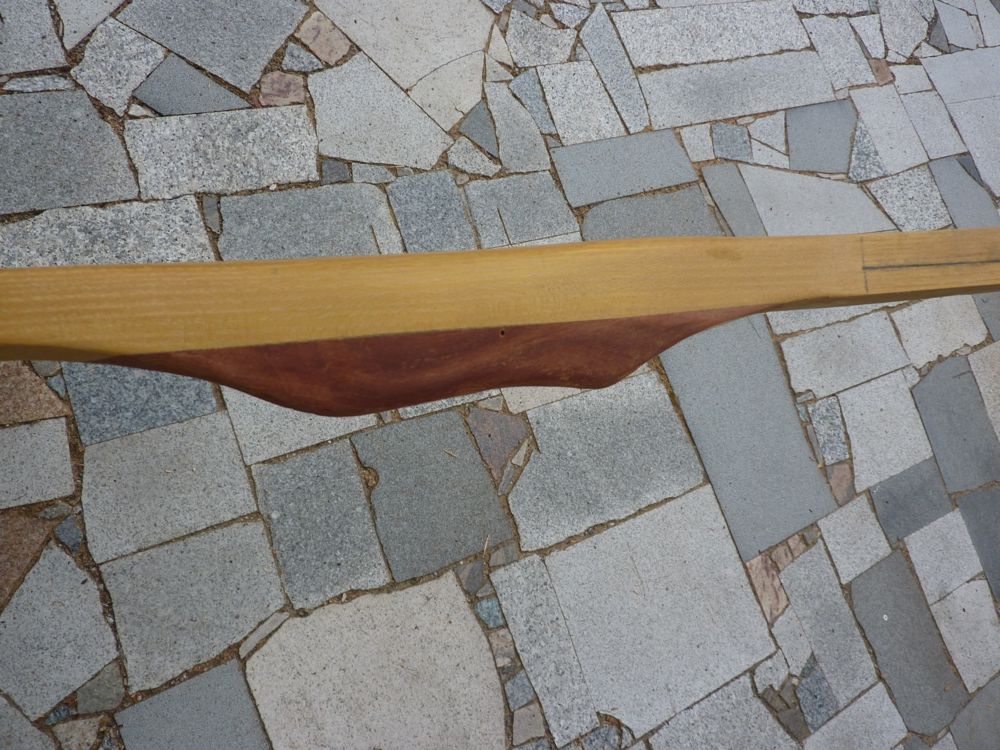

a bit sanding ….
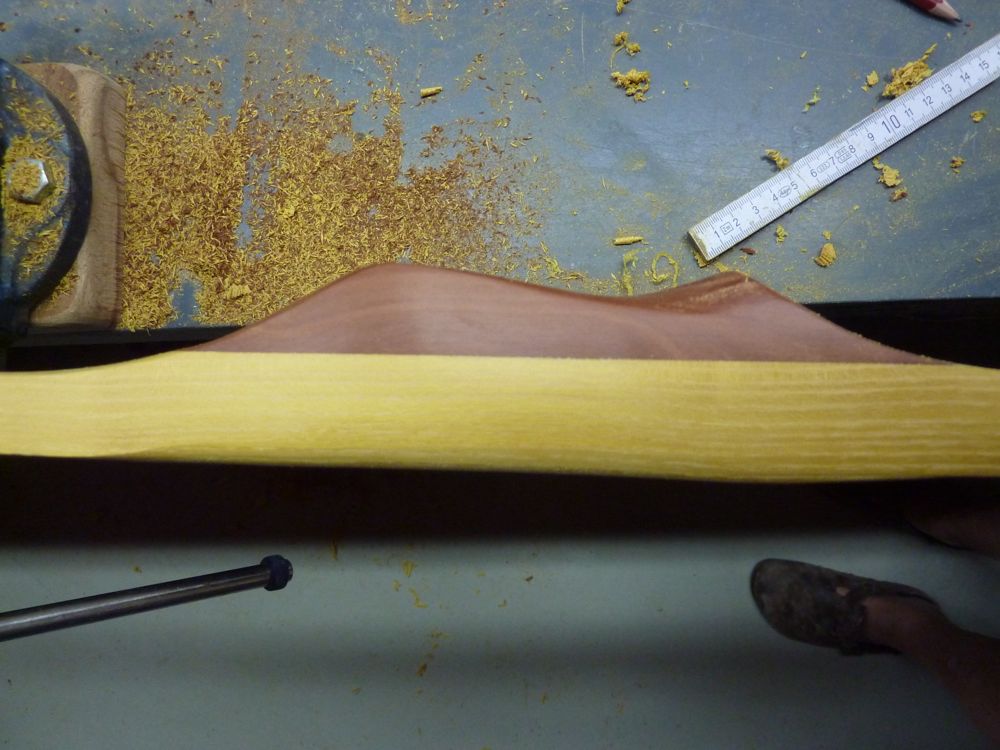
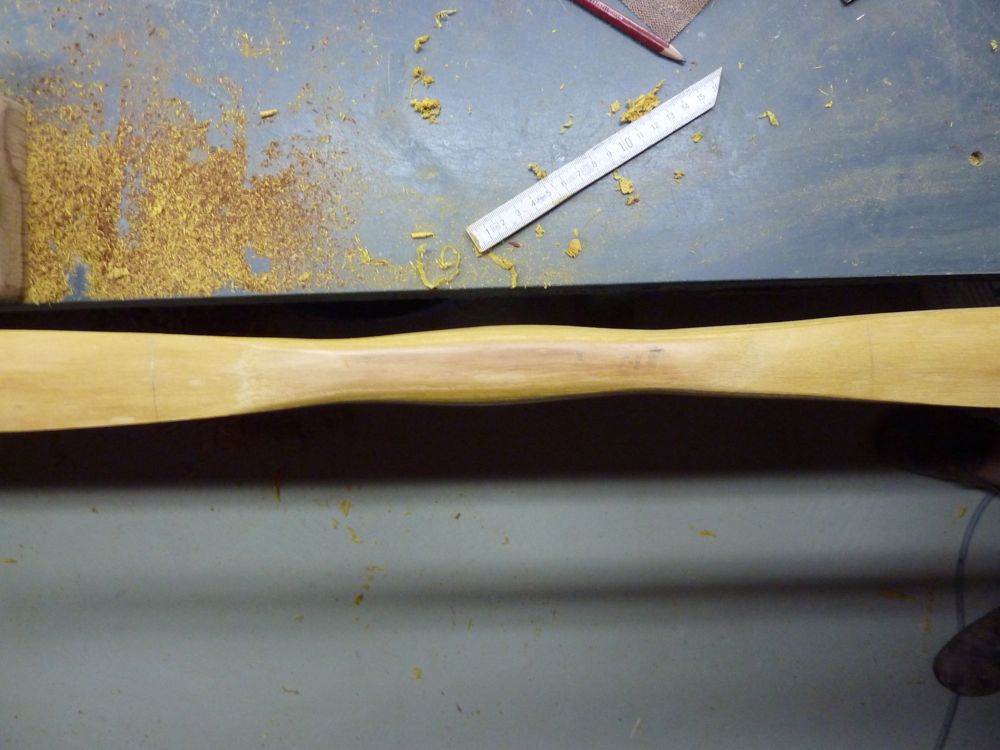
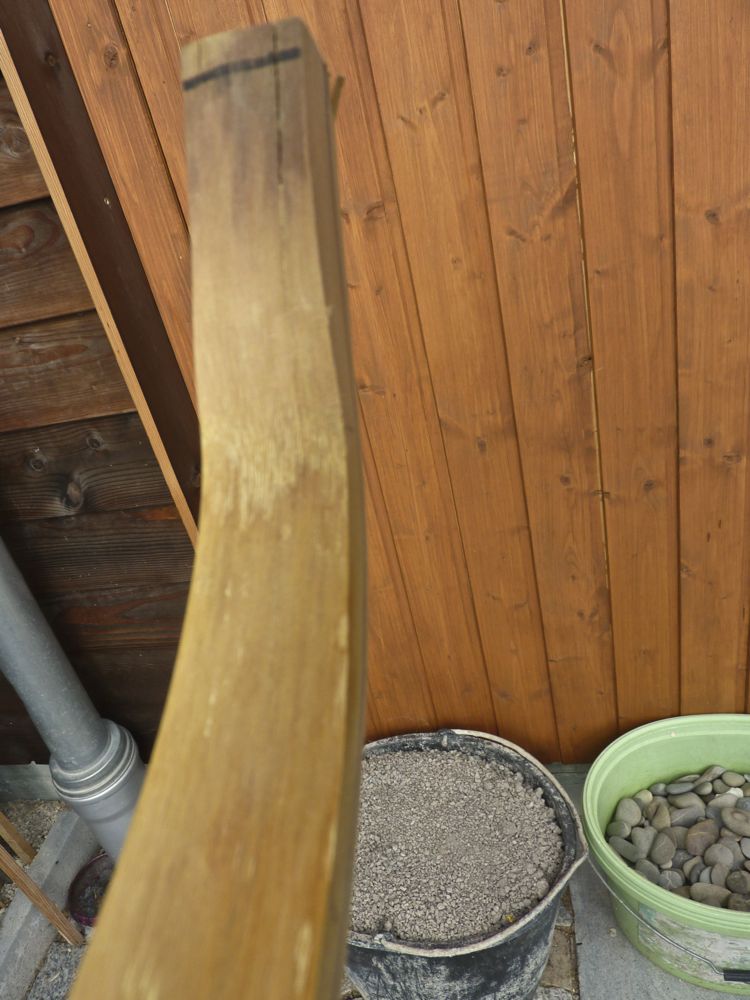
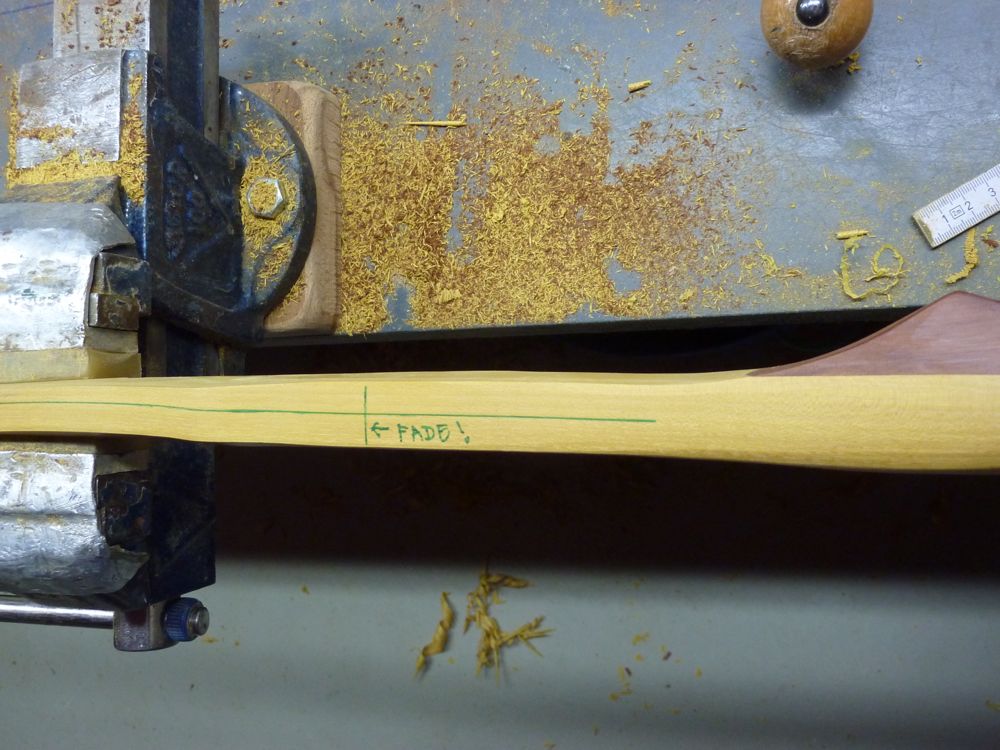
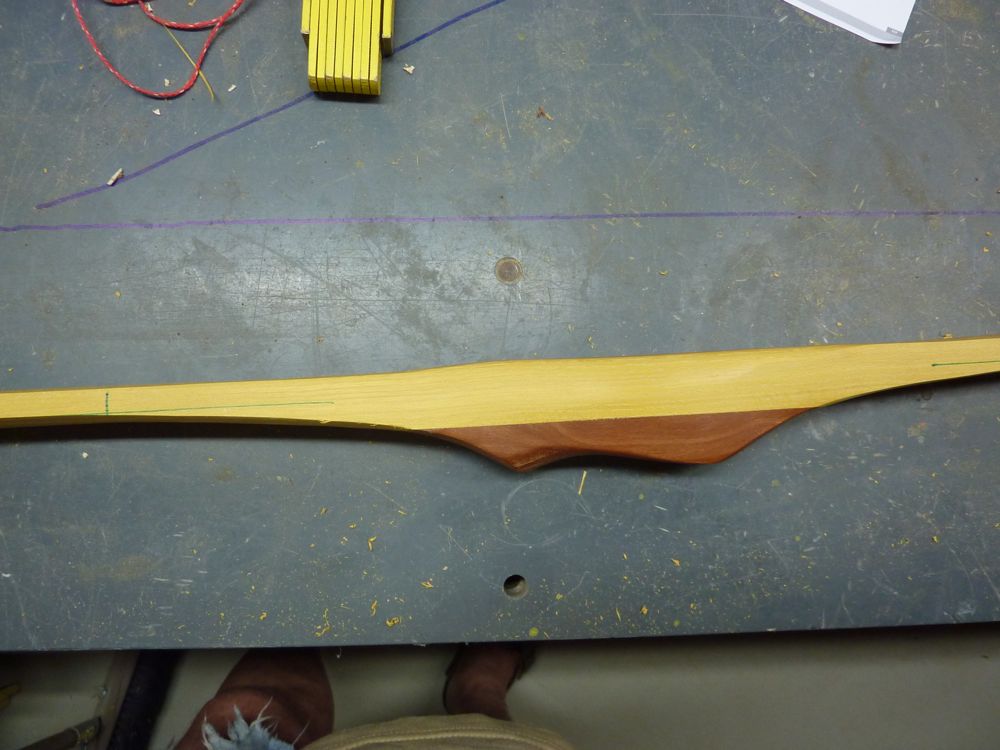
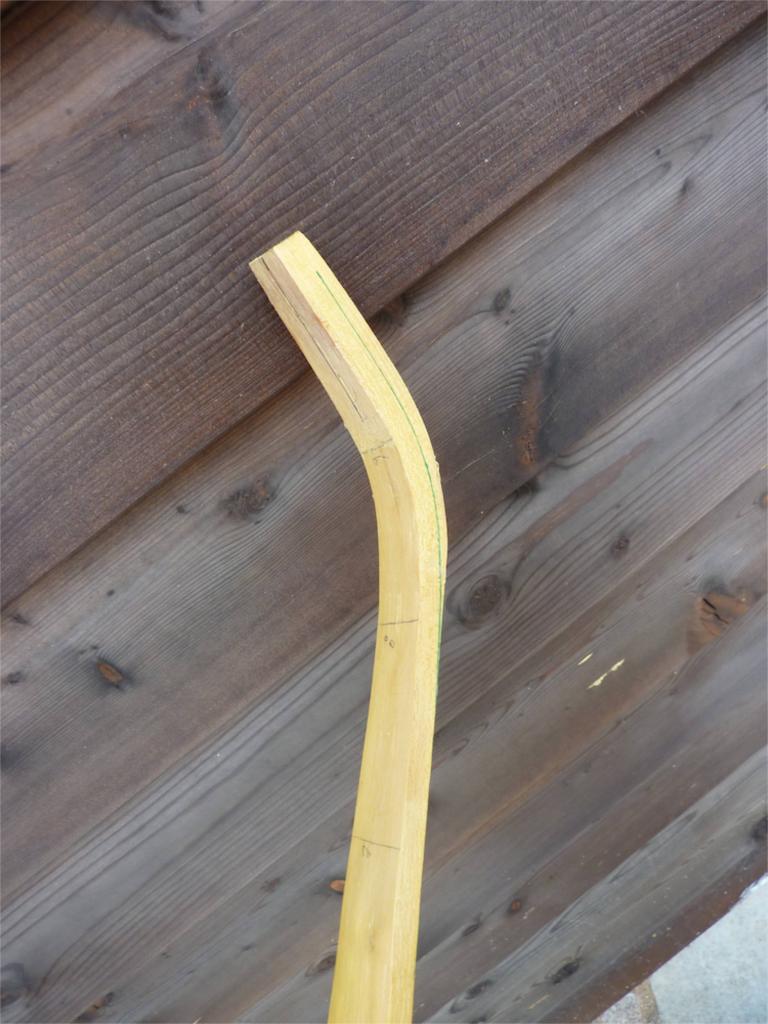
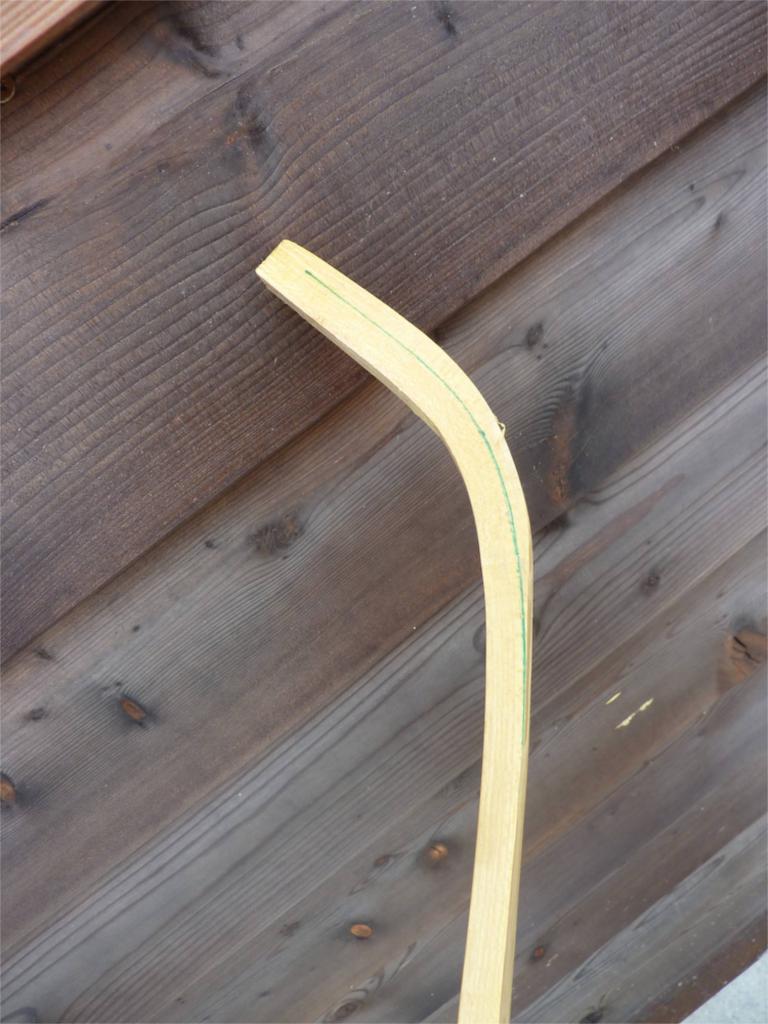
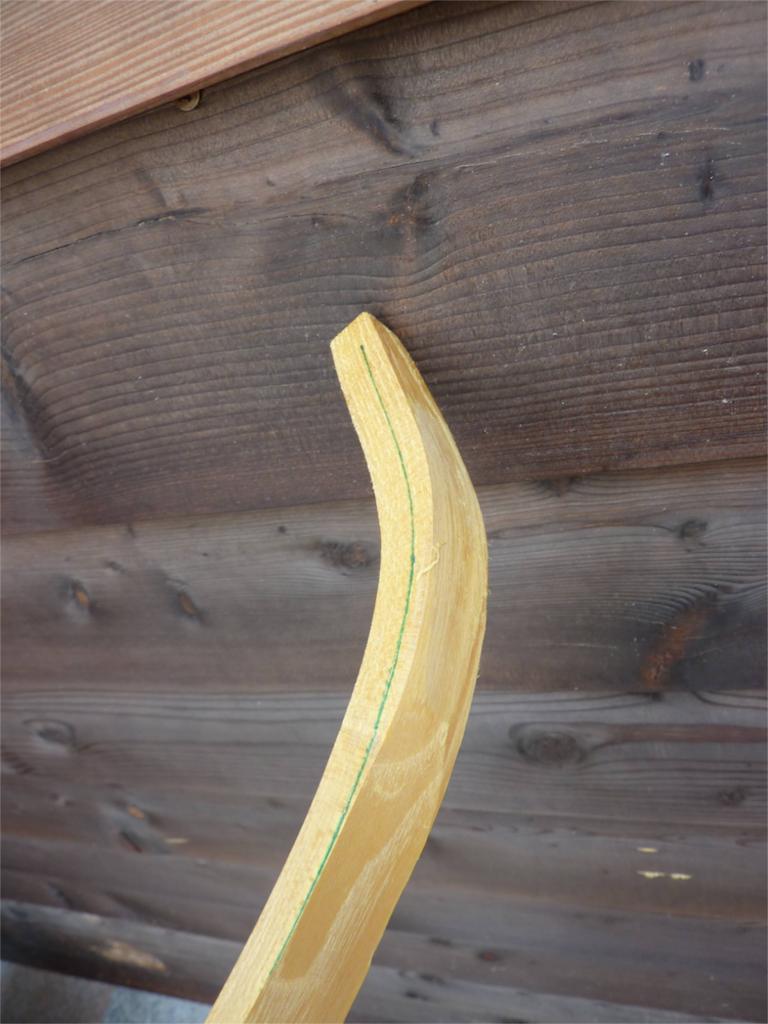
Now for the thickness. Here is a pic were a green line is drawn parallel (about 11/32”). you the mark “fade”, I hav egiven up the short fades (3” from handle) and decided to go for long fades (looks much better). So graduation mark 1 has become my new fade.
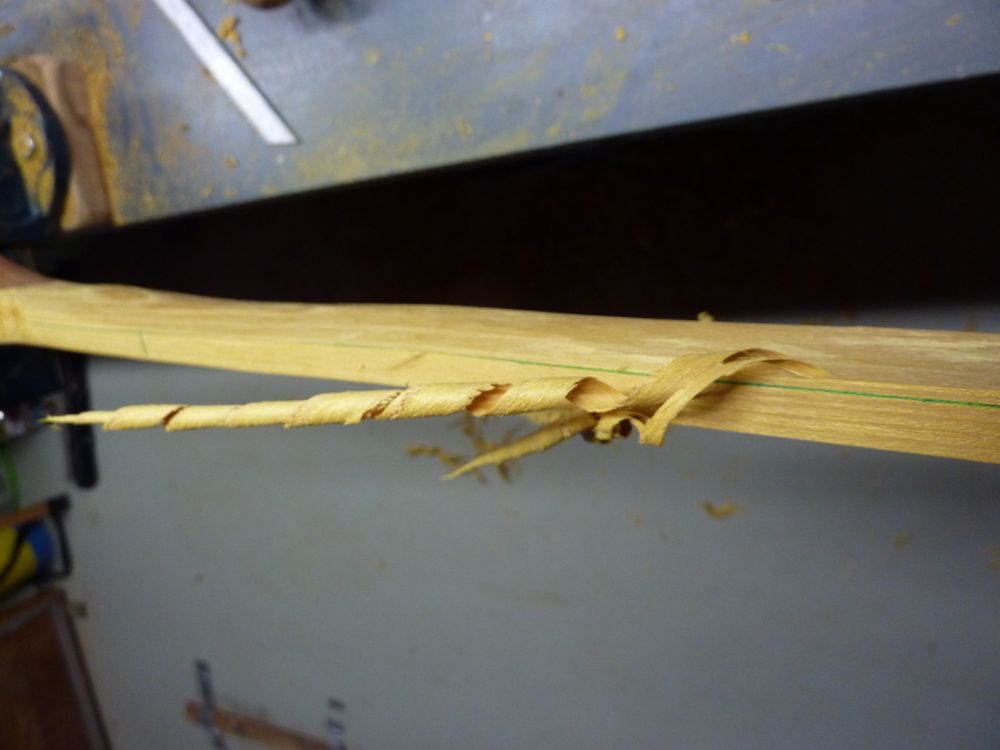

Working out very carefully to the green line, of course from fade to tip. I try to get a smooth transition from handle to fade. The tips, and recurves are let thick, this is a job for later. As said I use a razor sharp draw knife with a thick blade and a steep angle. This makes it easy to work exactly to a given line and you can get nicely curls
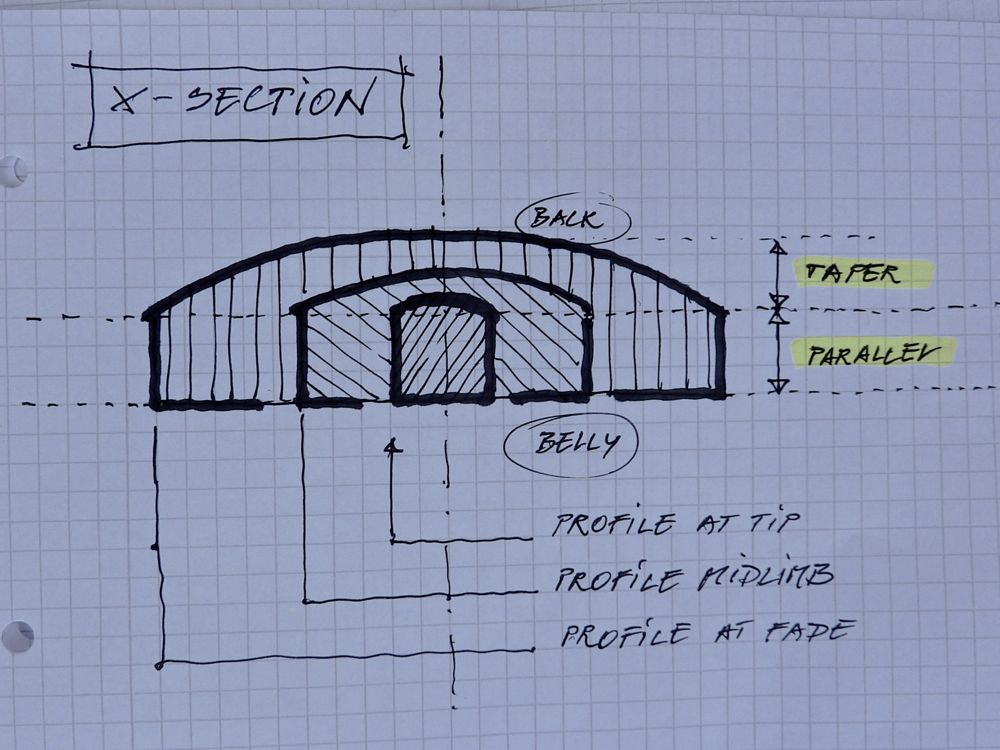
as you see above, working down the thickness to the parallel line creates an automatically taper from fade to tip.
Here is the leftover from session two
And this is how it looks like now

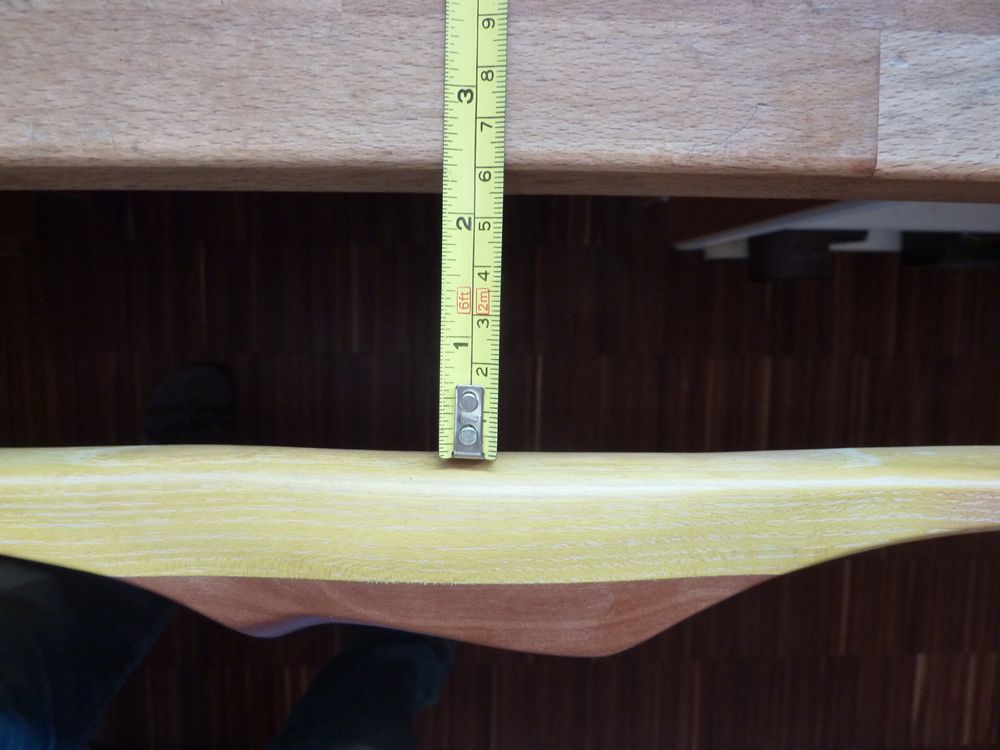
with all the interruptions for taking pics I (fool as I am) have forgotten doing the heat correction. I usually do this at the handle, but I have already glued on the plum! Only chance is bending in the fade. After measuring string alignment with a piece of cord it shows a bit more than 2” off. The handle is secured with alu foil to protect it from the heat.
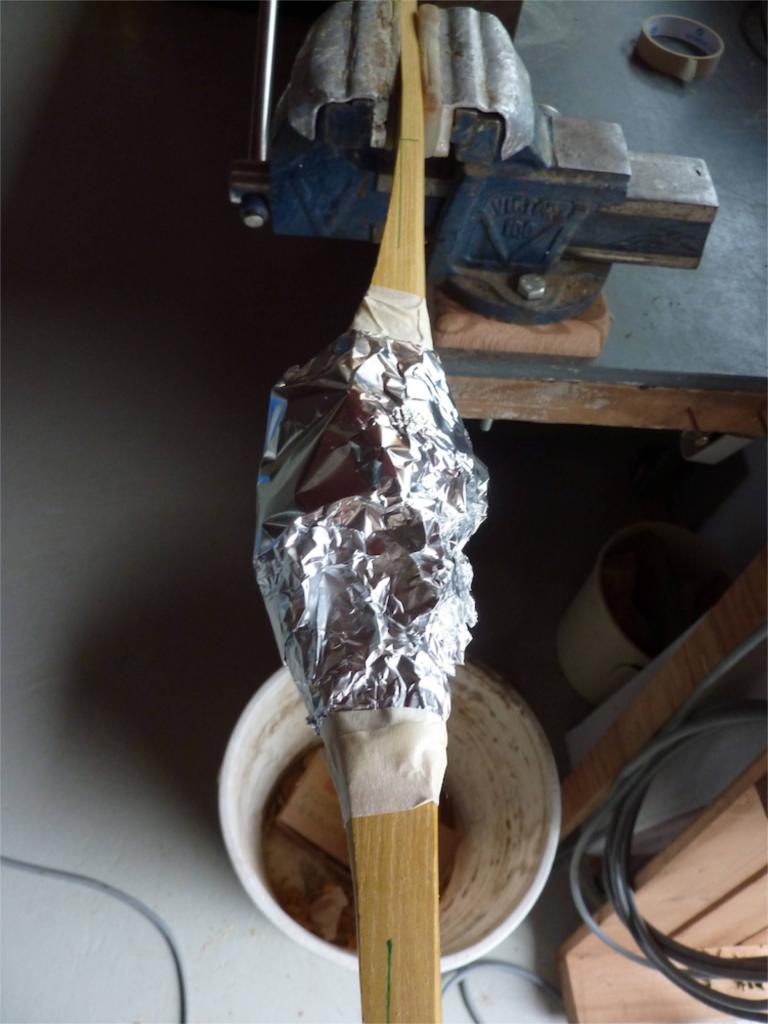
the ruler shows me how long I have to heat. After the bending job, I let it cool out for at least 2hours.
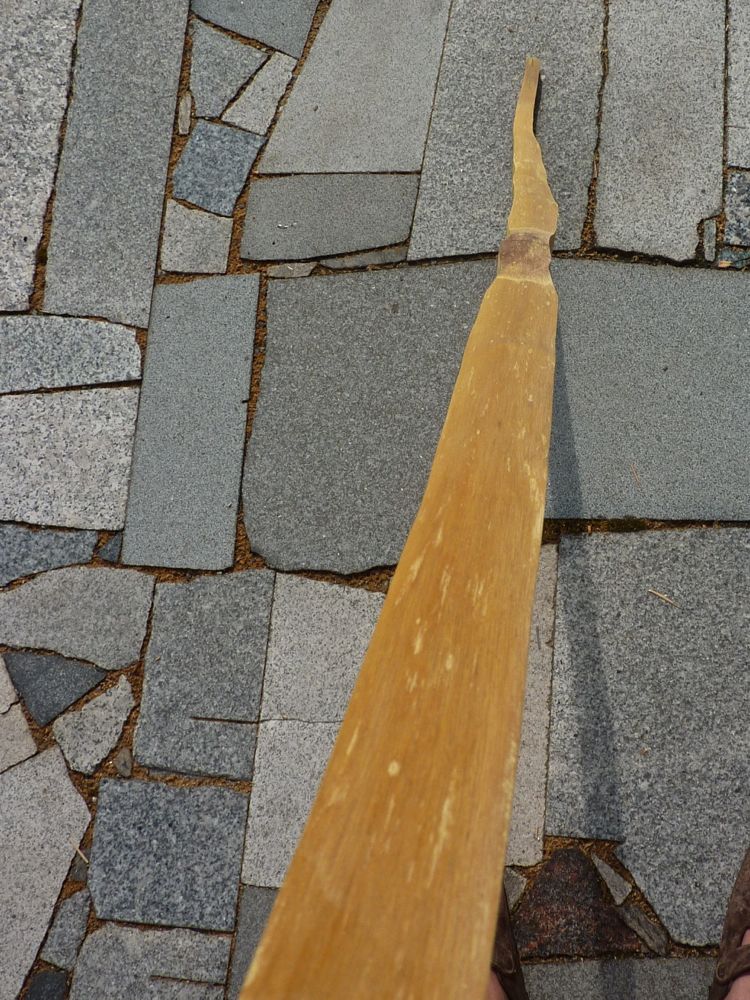
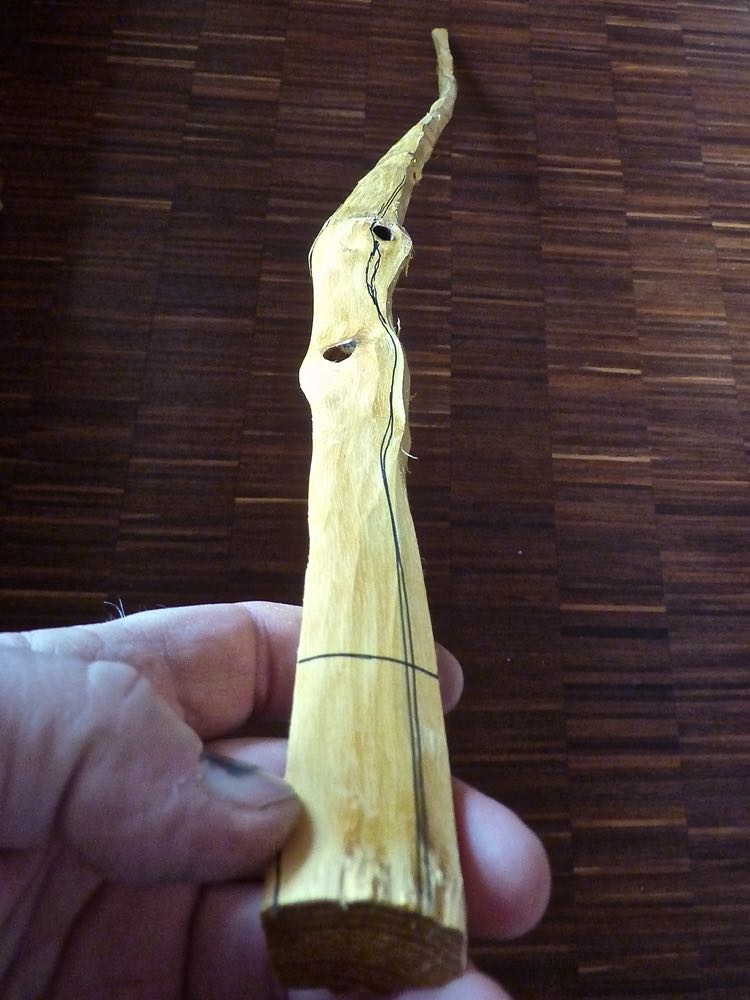
let’s continue with the tips. Here is a pic how it looks now:
reducing the width

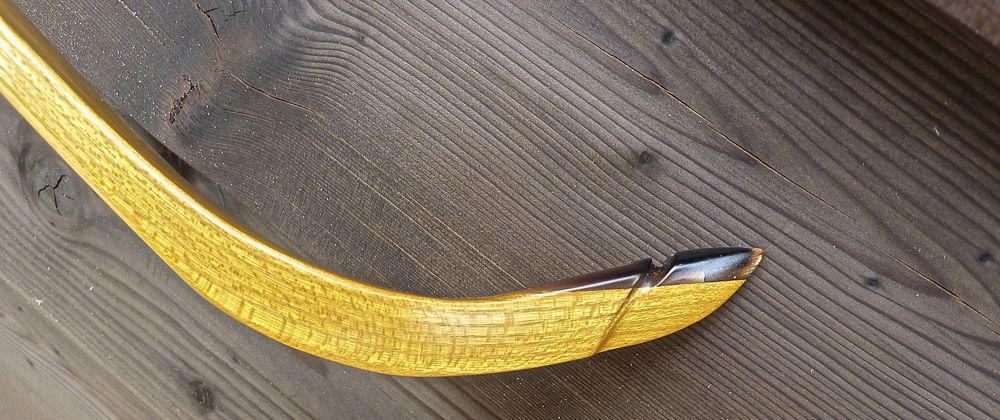
glueing on some brownish horn with super glue allows to continue in seconds
some rasping and filing
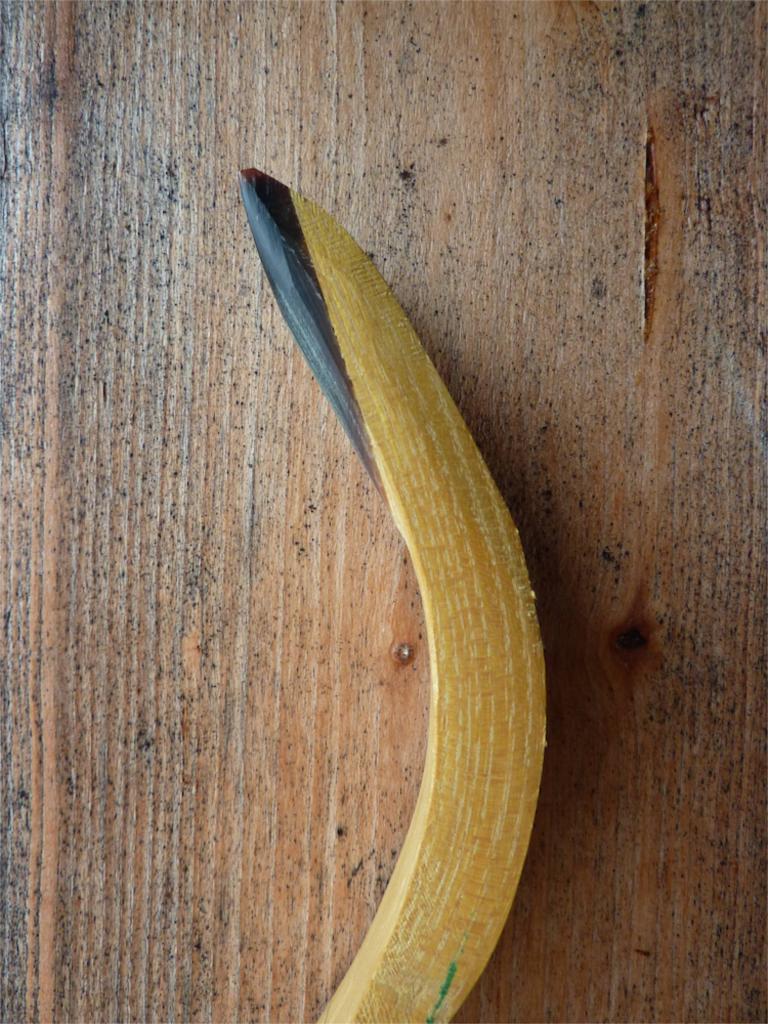
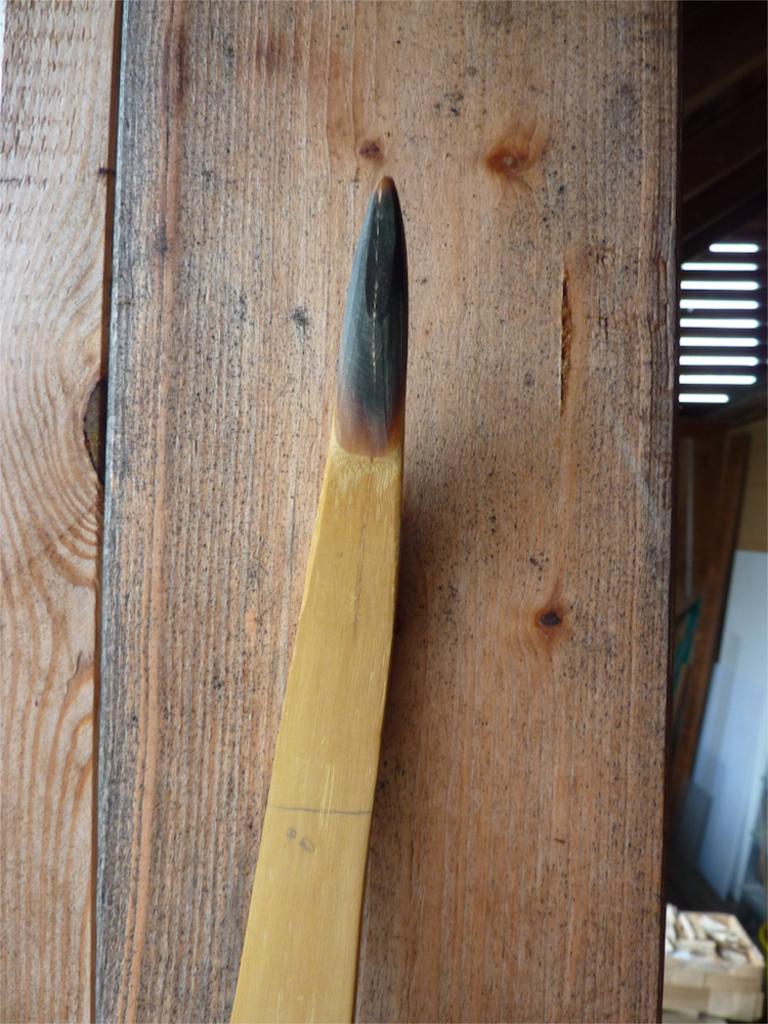
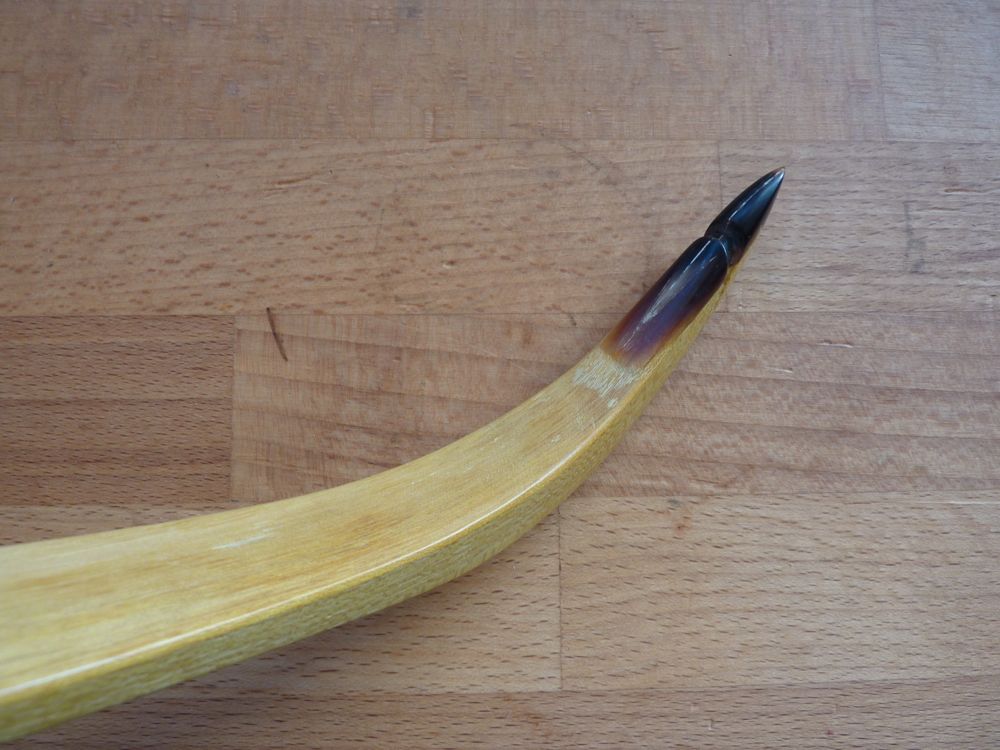
well, the overlays are shaped only need polishing
I have now rounded the sharp edges on the limb sides, I let them stand as long as possible – this is best guide for an even thickness taper.
I have reduced the with at the levers.
The leftover from these steps was a handful scrapes, forgot to take a pic.
The bow wasn’t bent till now, I haven’t done any floortiller. I don’t like this. Now I bent her over my breast a few inches to get a feel for the drawweight. Handle resting on the breast, bow horizontal, drawing back both tips. Meanwhile I’m quite good in estimating the weight.
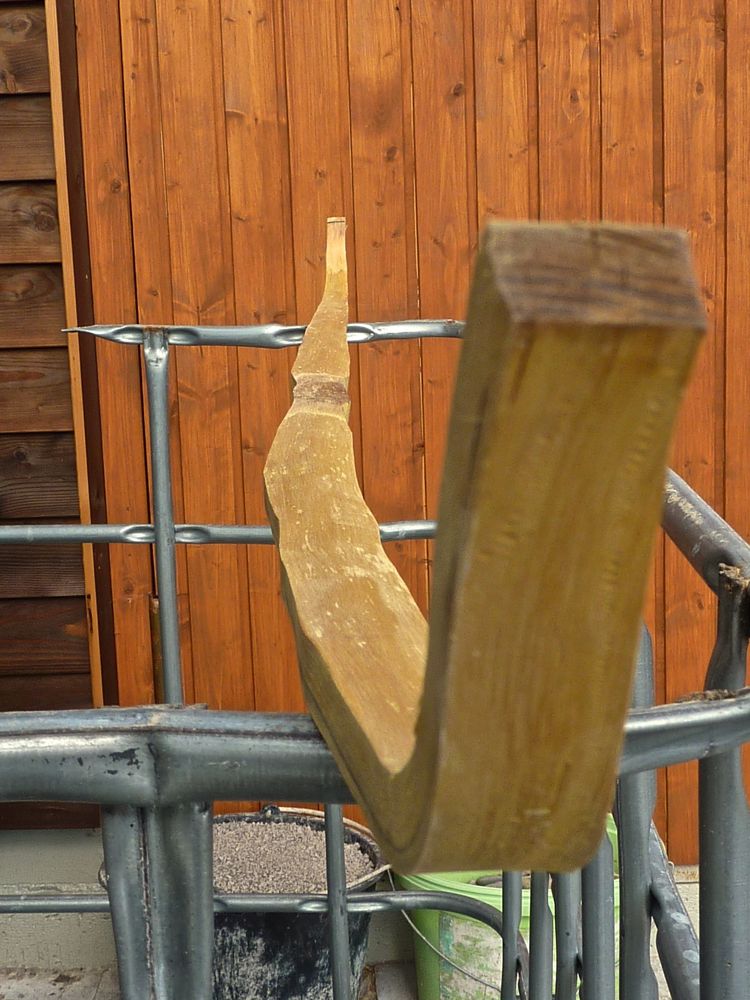
Here is a pic of the reflex the stave has
First I took out a longer string out of my pile and watched the bracing in a mirror (to be able for interruption when needed). You can see at once, when the bow is not in balance – one limb stiffer than the other.
It looked good, so I made a regular string for her, 6 strands of BCY 425X, strengthened with 2×2 dacron pieces (about 6” long).
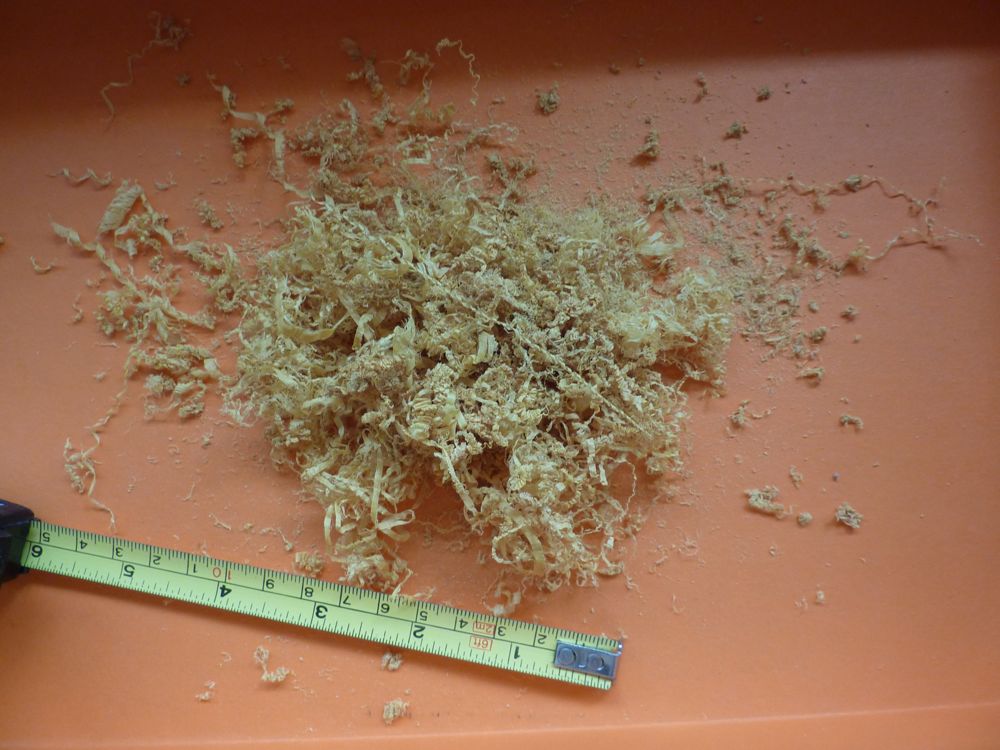
The first brace looked good and I had to make only a few adjustments here and there. All I scraped of is shown in the pic below, really! Never had this extreme before, this flakes weighs only a few grains. The complete tillering in this case is done in 10 min.
I do not use the tiller tree anymore for tillering, only my drawweight measurements are made here. All tillering is made by looking in a mirror while drawing the bow.
Now I leave it strung over night, to let the wood settle in. So now need for exercising the bow limbs. Next day I will see where adjustments are necessary, but my feel is good
I believe, the most exact layout working creates little tiller work
O.k. this is what I’ve done till now:
Some finishing sanding on tips and handle
A string groove filed in the lever
Rounding the edges on backside and a bit more on bellyside
First coat of finish to prevent re-moistureing

As said before, the bow was braced over one night to let the wood settle in.
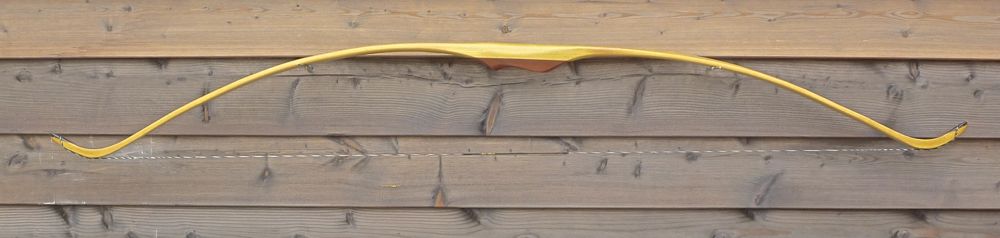
Now the reflex has decreased to 1¾”. In other words, the bow took a bit than ½” set.
The tiller looks now a bit uneven, lower limb is too stiff. Let’s do a few scrapes on the entire lower limb and additional on both outer thirds a few scrapes .
When short drawing the bow, I mean I will not reach the 60# – feels a bit lighter. We will see the result, when shot in on the digi scale..
I’m thinking on heating in some reflex, to compensate the set and the probably underweight too.
Also a further mass reduction at the levers could add a few fps more. That are options for the future. Not sure for now. Perhaps better shoot it in for some hundred arrows.
Ahh, forgot – the bow is 58½”ntn, mass is 498grams (17½oz) and I want a 28” draw.
This is what I’ve done next:
Thinned the tips about a third
Narrowed the tips about a third
Deepened the string groove
Reduced mass at horn
Scraped a bit on the lower limb (about 10 long scrapes from fade to tip)
Additional scrapes both lims outer thirds, begin scrape the whole limb and getting shorter
It came along … with a few grains of yeller scrapes
The bow still holds the 2” reflex

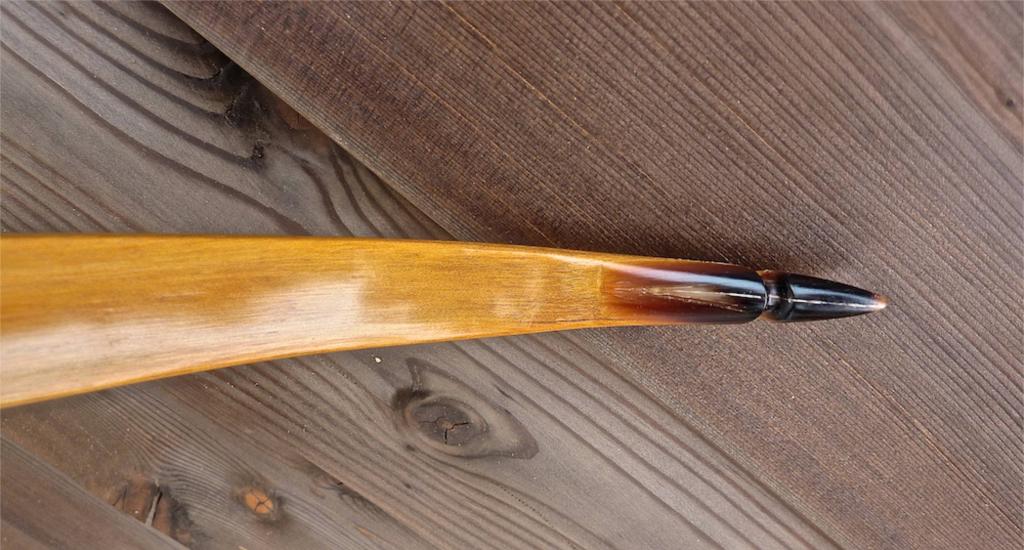
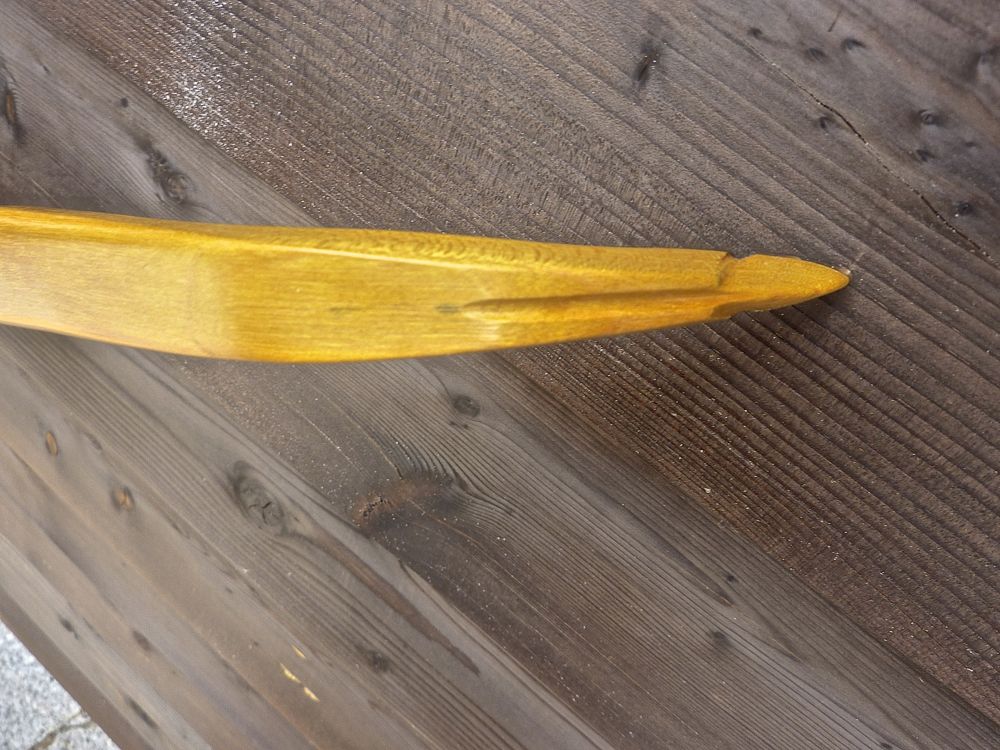
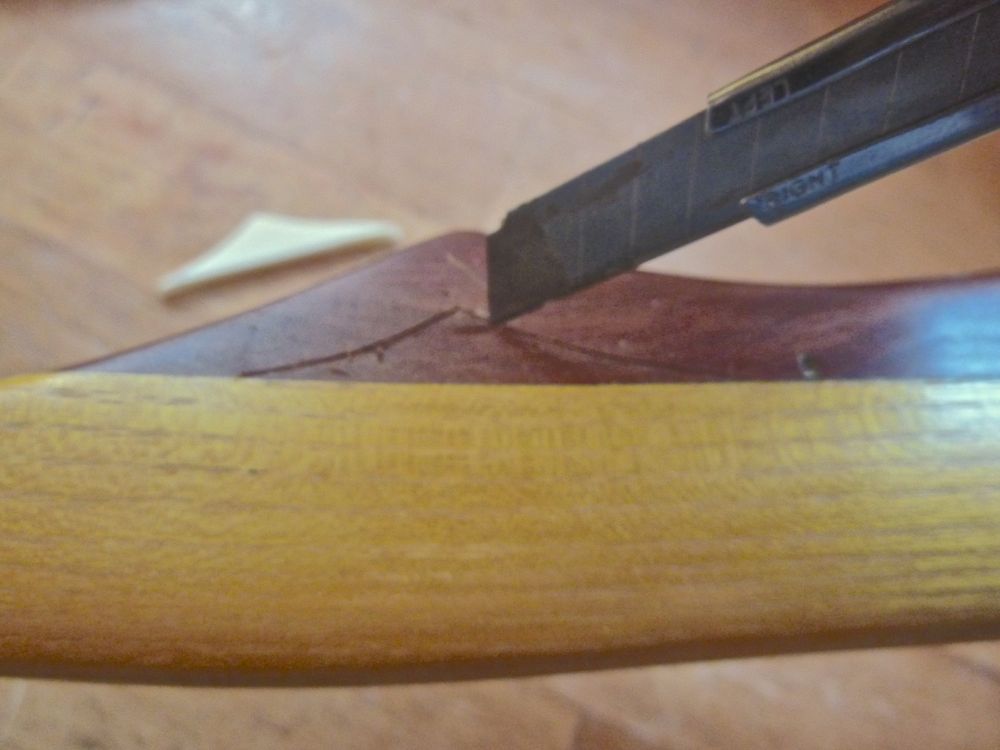
Thought an arrow strike plate would look cool, decided bone as material
I have some bone plates prepared as sheet about 3 or 4 mm.
Sawed out a triangle and sanded in some matching curves with a belt sander.
The contour is cut in, then the hole is done – all with a simple NT-Cutter.

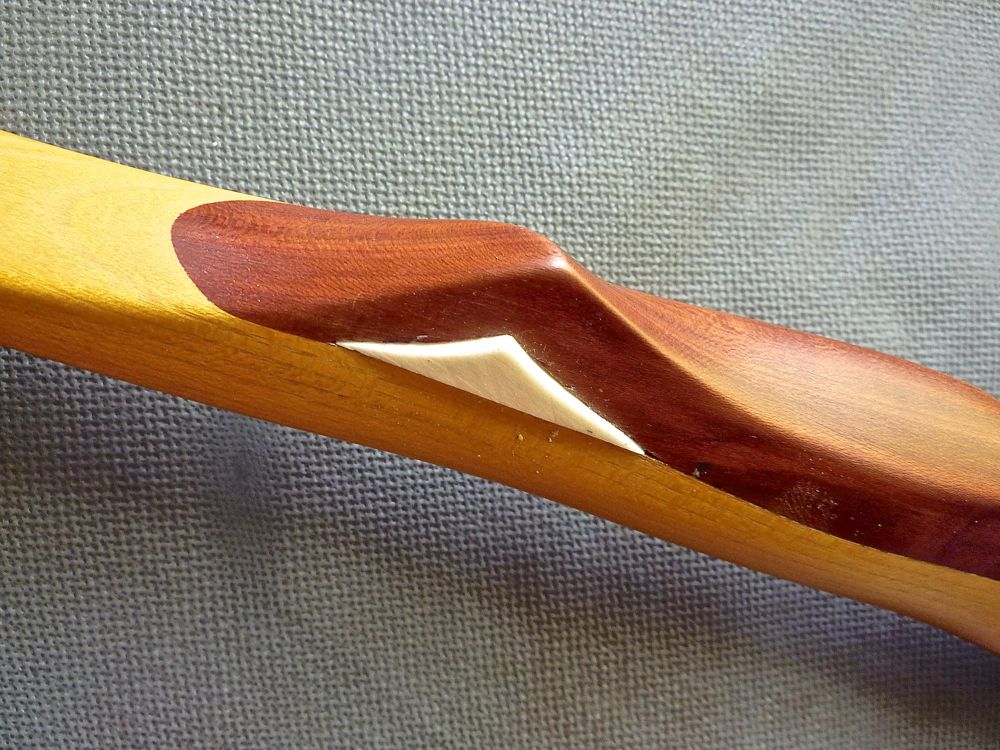
After some carving, I got it just sand down – but with the bone as highest place of course.
Let’s call the bow done now, I will post it in an extra thread for easier handling
The finished bow is here!
12 Comments
Hello Simon ,
My name is Mike and I am from the UK . First of all let me congratulate you on an absolutely fantastic website which is full of informative yet easy to follow instructions for various projects . I was particularly interested in the “Osage Static buildalong No 47 ” . This is exactly the type of bow I am intending to construct . Can you give me some advice regarding which other woods would be suitable for strength and elasticity , Maple , Oak , Ipe ? also I UNDERSTAND ABOUT THE FADES ETC BUT WHAT DICTATES THE RISER (HANDLE ) DESIGN ? Would you not have to have another piesce of thin wood fitted between the stave and the riser to help prevent the compression from loosening the riser ? Or will the fades do that job ?
Kind regards .
Mike
Mike,
thanks for your kind words!
Your question:
You can use nearly every wood you like, if it is not too soft. I myself have used a lot different woods, mostly i went for a contrasting wood like here. Sometimes I use leftovers from the same stave, so that it is hard to even see the glue joint.
Easiest way is to have sharp fades at the non bending part of the handle, otherways there is a risk for riser popping off.
If you cannot avoid, or in other words if you have to glue on overlays on bending parts: Use the best glue you can find (epoxi), be sure to have a smooth fading in (no aprupt transition).
Good luck for your project!
Simon
Hello Simon again ,
Just out of pure interest can you tell me why you think Osage is the best wood for bow making ?
Many thanks .
Mike
osage can handle the stress of tension (back) and compression (belly) best of all woods. You can make nearly all designs out of this wood. It is most forgiving if you make a mistake.
…. and it is beautiful wood!
Hello Simon ,
I hope you do not mind me asking these questions regarding bow making , but I need to understang certain things !
. Would it be practical to build a Recurve Bow with a Bamboo backing for extra strength ?
. And if so would I glue the Bamboo onto the main stave before I start to steam the bow to make the recurve / or would I do the stave and Bamboo separate and then glue them together ?
. Ideally , what thickness should the bow be after joining the two pieces together ?
. Would this combination benefit the overall use of the Bow ?
I hope you can answer my questions as I want to make a good job of making the bow !
Kind regards .
Mike
Extra strength: you can do, but you also can make a selfbow with high poundage
Steaming: before the glue job!
Thickness: belongs to the desired strength of the bow, watch my bows there are sometimes measurements noticed
I don’t understand the last question … sorry
Hello Simon ,
I have just noticed I think you said that the limbs are different lengths ???
. What dictates this / Why ?
. Which is longest upper or lower ?
It is a geometrical problem. The pivot point (where the pressure of your bowhand sits) should be also the place where the arrow should go out – impossible!
Best would be that this point is excat the middle of the bow, but you need some place for your hand and the compromise is to go with the handle 1″ above and 3″ below the bow’s center. Arrow pass is then also 1″ above. This makes the upper limb 2″ longer than the lower limb (handle is 4″).
Hello Simon ,
Thankyou again my friend , you have so much knowledge regarding Bow making and you have been a great help . That was agood answer to my last question so now I understand . Osage is difficult to get here in the UK , can you advise any British hardwoods that are good in compression and tension that are also good for steam bending ?
Thanks again
Mike
Elm, ash, black locust, cherry, apple, plum, walnut, …. +++
perhaps you should contact Derek Hutchinson (go to the Link section, there you find his website). As he is an Englishman, he can give better advise than I.
Hi
Browsing your site, What a gift you have !
I don’t understand why there is an automatic thickness taper when you follow the parallel line ?
Thanks
Manu
Hi Manu,
Look at the scetch (about in the mid of this buildalong), I think you will understand then what I mean.
Well, it works only when the crown on the back is continous along the whole limb length. On an absolut flat belly you can’t get that automatic taper. But it is much more easier to start thickness taper from parallel lines. Hope this works for you …